120V vs. 240V Welder for a Home Garage: Why 110V Breakers Trip (And the Real Thickness Limits)

Relying on standard household outlets for welding causes tripping breakers and dangerous cold-lap joints. Learn the real amperage math, thickness limits, and dual-voltage smart buys.
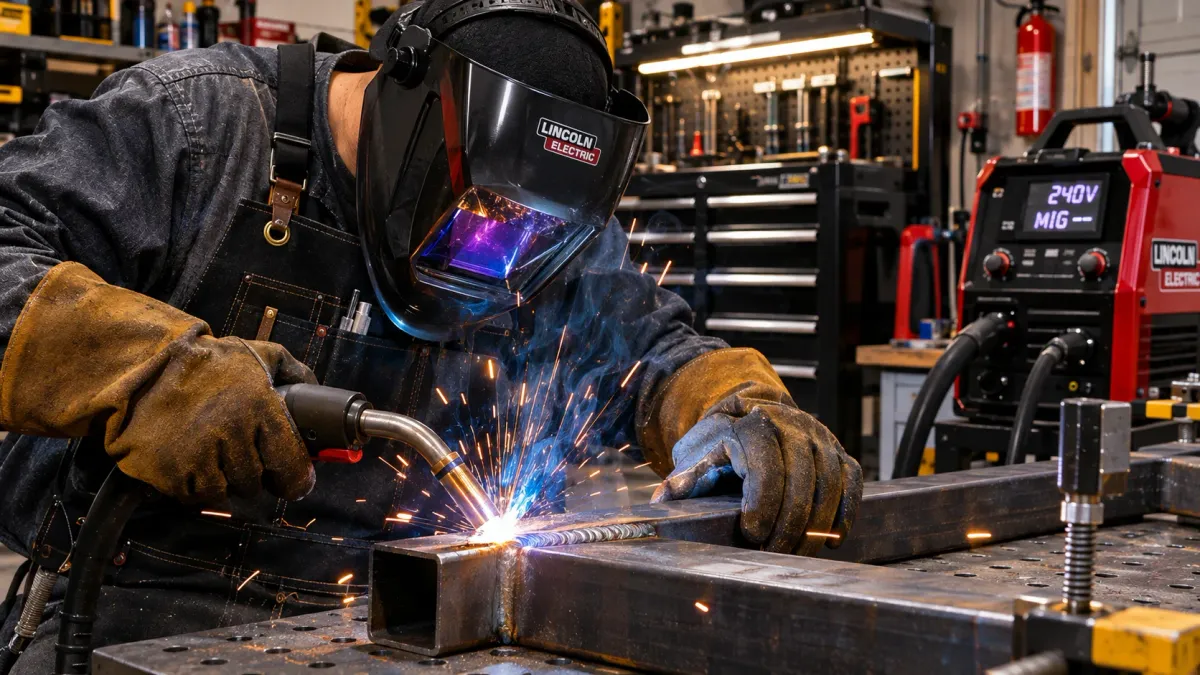
Table of Contents5 Sections
You lower your auto-darkening welding helmet, pull the trigger on your brand-new 120-volt wire-feed welder, and strike an arc on a steel trailer tongue. Fifteen seconds into the weld bead, you hear a loud mechanical snap from the back wall; your arc dies instantly, the garage ceiling lights plunge into darkness, and the half-melted wire freezes into a bird nest inside your gun tip because your machine just tripped the 15-amp household circuit breaker.
Budget tool marketing frequently promises that a compact 120-volt MIG welder can weld everything from sheet metal fenders to three-sixteenths structural steel on an ordinary household outlet. Beginners buy these small machines, plug them into shared wall outlets using long extension cords, and find themselves fighting constant breaker trips and brittle, porous welds that crack under load.
I spent decades running structural field welds on heavy excavation equipment and fabricating custom shop tooling. In this guide, I break down the electrical conservation math governing welding arcs, explain why cold-lap defects cause dangerous structural weld failures, and show you why investing in a dual-voltage multi-process machine is the smartest financial move for a home garage.
The Amperage Math: Why 120V Machines Choke Your Home Circuit
The American Welding Society (AWS) arc welding safety and voltage drop guidelines emphasize that voltage drops exceeding 3% severely degrade arc stability and puddle wet-out on heavy wire feeds.
To melt solid steel, an electric arc must generate temperatures exceeding six thousand degrees Fahrenheit. According to Ohm’s electrical power law, electrical wattage equals voltage multiplied by amperage.
When a welding power supply converts 120-volt wall power into a 19-volt, 140-amp short-circuit welding arc, the machine demands immense primary current from your electrical panel. At maximum output, a typical 140-amp wire-feed welder draws 20 to 24 amps of continuous current from the wall.
Standard residential outlets are wired on 15-amp branch circuits using thin 14 AWG copper wire. Running a 24-amp welder load through a 15-amp breaker overheats the bi-metallic thermal strip inside the breaker, tripping the circuit within seconds.
Even on a dedicated 20-amp outlet wired with 12 AWG copper, the massive inrush current required to initiate the arc causes severe voltage drop. When voltage sags, the wire feeder motor stutters, the shielding gas flow fluctuates, and the machine spatters erratic blobs of molten metal rather than laying down a smooth, rhythmic weld bead.
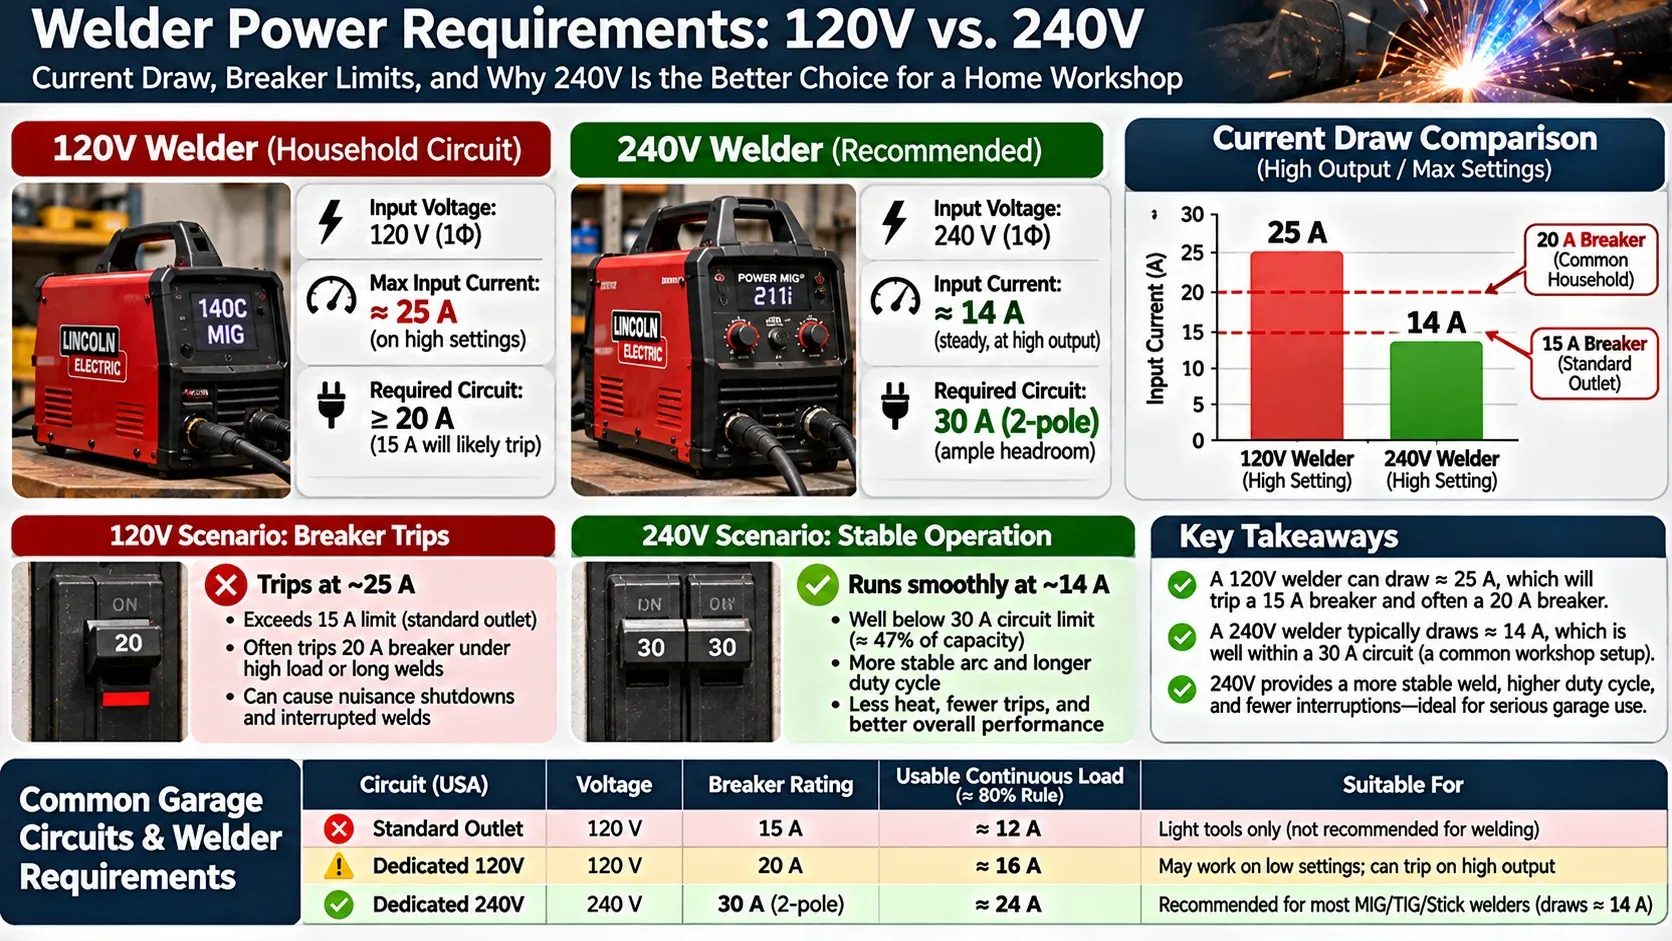
Electrical engineering comparison chart showing input power requirements for welding machines, bar graph showing 120V welder drawing 25A on high settings tripping standard 15A/20A household breaker, compared to 240V welder drawing smooth 14A well below 30A circuit limits, crisp technical graphics.
Metal Thickness & Voltage Selection: Matching Steel to Power
Determine whether your fabrication projects require 120V convenience or mandatory 240V penetration.
Automotive sheet metal, body panels, and light sheet ducting (22 to 16 gauge, under 1.5mm)
Square steel tubing, workbenches, and tool carts (1/8-inch, roughly 3mm wall thickness)
Trailer hitches, suspension brackets, engine stands, and structural plate (3/16 to 3/8-inch steel)
The Invisible Danger: Cold Lap (Lack of Fusion)
Beyond having adequate voltage, clamping your work solidly to a true flat metal surface is critical for clean ground current. Check my guide on building a flat DIY welding table to fabricate a true, rigid welding fixture for your home garage.
The most insidious hazard of welding thick steel with an underpowered 120-volt machine is a defect known as cold lap or lack of fusion.
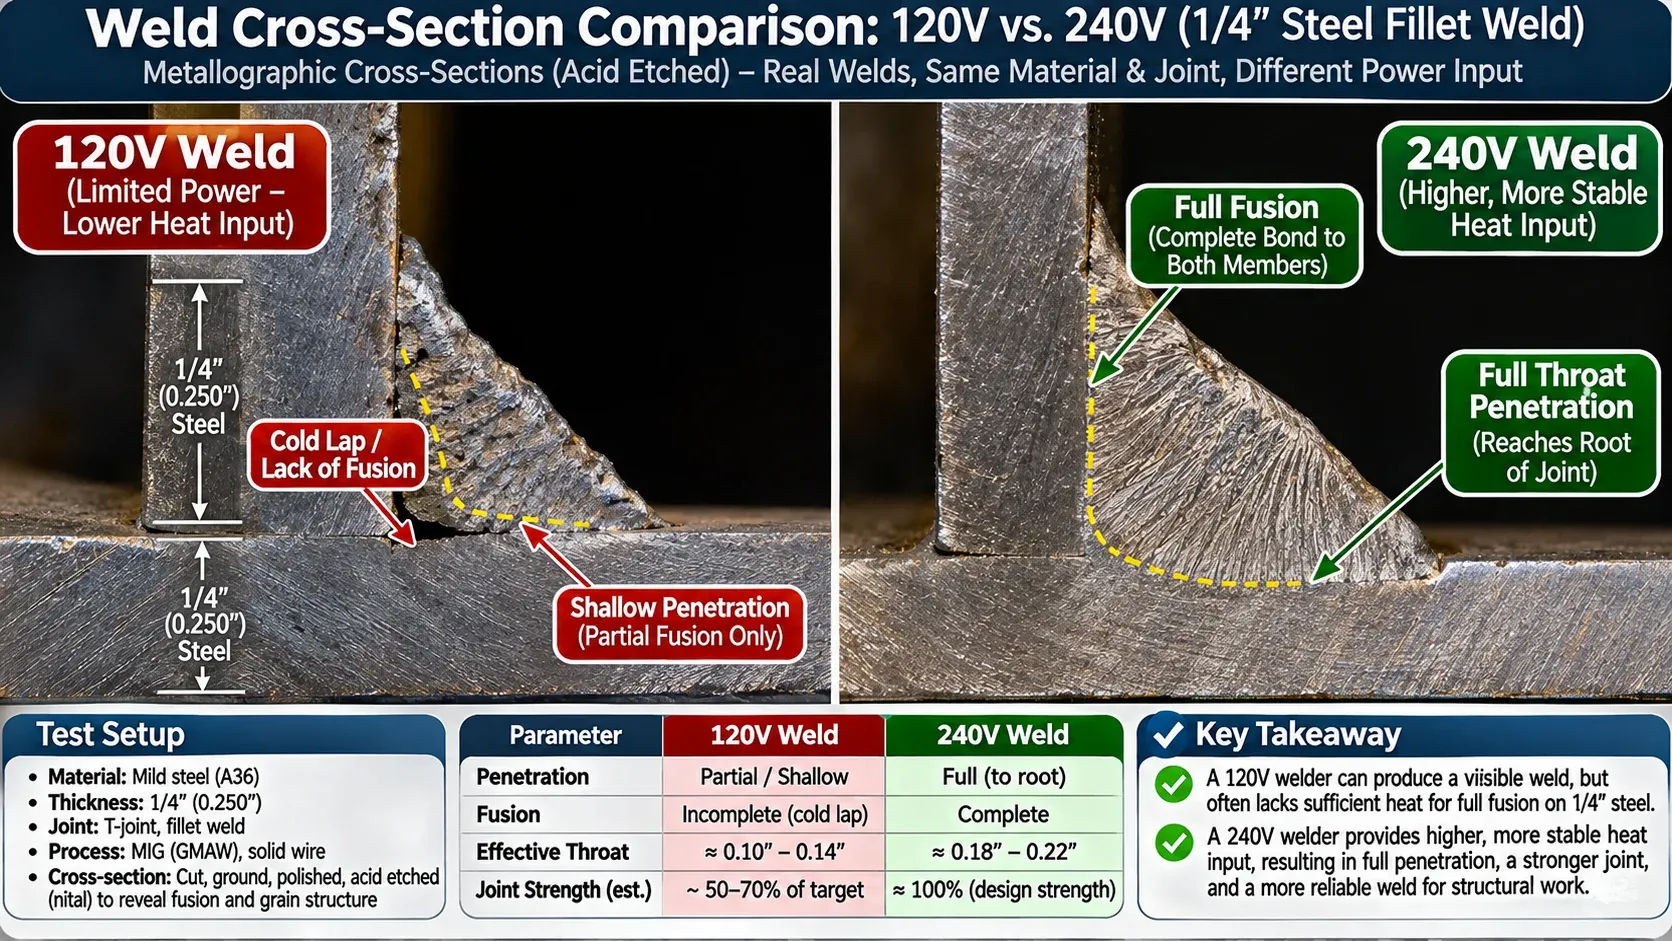
Macro metallographic cross-section photo of two steel fillet welds etched with acid, left showing 120V weld with cold lap lack of fusion on 1/4-inch steel plate, right showing 240V weld showing full throat penetration deep into root of joint, clear labeling.
A beginner welds a 3/16-inch steel bracket onto a utility trailer using a 120-volt machine cranked to its highest voltage tap. The finished weld bead looks visually decent from the surface: it has a uniform width and sits smoothly along the seam.
What the operator cannot see is the metallurgical root. Because the 120-volt arc lacked sufficient heat to liquefy the thick steel base plate, the molten filler wire simply laid over the cold base metal without fusing into its crystalline grain structure, functioning like hot glue spread over cold glass.
Under static conditions, the part holds together. But when that trailer hits a pothole at highway speeds under a two-ton load, dynamic vibration fractures the brittle interface, causing the bracket to shear off cleanly without tearing the base metal. You must never weld safety-critical structural components with a 120-volt machine.
The 240V Sweet Spot: Why Your Welder Will Love You
Upgrading your welding station to a 240-volt circuit transforms your fabrication experience immediately.
When you double the supply voltage from 120V to 240V, the primary current drawn by the machine drops in half for the exact same wattage output. A machine drawing twenty amps on 120V draws only ten amps on 240V, keeping conductors cool and eliminating voltage sag.
Your arc initiates instantly with a crisp, bacon-sizzling hum rather than an erratic pop and spatter. The molten weld puddle wets out smoothly into both sidewalls, delivering deep root penetration on steel up to 3/8-inch thick in a single continuous pass.
Furthermore, 240-volt operation expands your machine’s duty cycle. A 120-volt machine running wide open typically features a 20 percent duty cycle (meaning you can only weld for two minutes out of every ten before the thermal overload shuts the power down). On 240-volt power, the duty cycle frequently jumps to 40 or 50 percent, allowing you to fabricate heavy projects without constant downtime.
Welder Power Configuration Matrix: 120V Only vs. 240V Only vs. Dual-Voltage
Comparing metal penetration limits, electrical wiring demands, duty cycles, and investment value.
Budget 120V-Only Welder
Auto body patch panels, exhaust pipes, and light garden art
- Plugs into standard household 120V 20A wall outlets
- Struggles on steel thicker than 1/8 inch
- Low 20% duty cycle
Dedicated 240V-Only Welder
Dedicated metal shops, agricultural repair, and heavy chassis builds
- Pours out 200+ amps continuously
- Welds 1/2-inch plate easily
- Cannot be plugged into standard household outlets for mobile jobs
Dual-Voltage Multi-Voltage Plug (MVP)
Serious DIY builders who want a lifetime machine that grows with their shop
- Runs 120V today
- Unlocks 210A commercial power tomorrow with a plug swap
- Higher upfront purchase price than entry-level budget boxes
The Smart Compromise: Dual-Voltage Machines
If your garage currently lacks a 240-volt outlet, do not waste money buying an entry-level 120-volt-only machine that you will outgrow in twelve months.
Purchase a dual-voltage unit equipped with Multi-Voltage Plug (MVP) technology, such as the Hobart Handler 210 MVP. These smart machines include two interchangeable pigtail plugs that twist lock onto the heavy main power cord.
Today, you can attach the 120-volt plug and run the machine on your garage’s dedicated 20-amp outlet to repair lawnmower decks, build rolling tool stands, and weld thin sheet metal.
Next year, when you wire a 50-amp subpanel or install a 240-volt NEMA 6-50 outlet, you simply twist on the 240-volt plug. The internal electronics automatically reconfigure the power transformer, instantly unlocking 210 amps of commercial welding power capable of slicing through 3/8-inch structural steel plate.
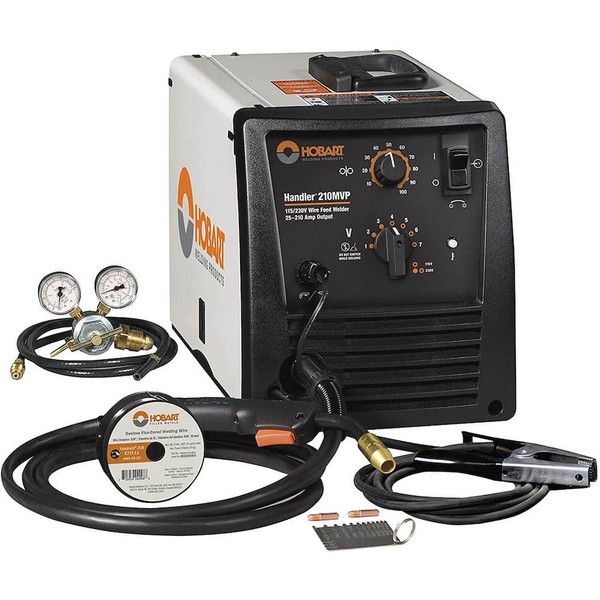
Hobart Handler 210 MVP MIG Welder (Dual-Voltage 115V/230V)
Best For: Lifetime garage fabrication from 24-gauge to 3/8-inch steel
Est. Price: $899 - $980
"The gold standard dual-voltage workshop welder, built with heavy copper components that deliver commercial arc stability for decades."
- +Dual-voltage MVP plug swaps between 115V and 230V in five seconds
- +Heavy cast-aluminum drive roll system feeds wire without birdnesting
- +Pumps out 210 amps of smooth arc power with seven voltage taps
- -Weighs 79 pounds; benefits from mounting on a rolling welding cart
- -Shielding gas cylinder and regulator required for clean solid-wire MIG
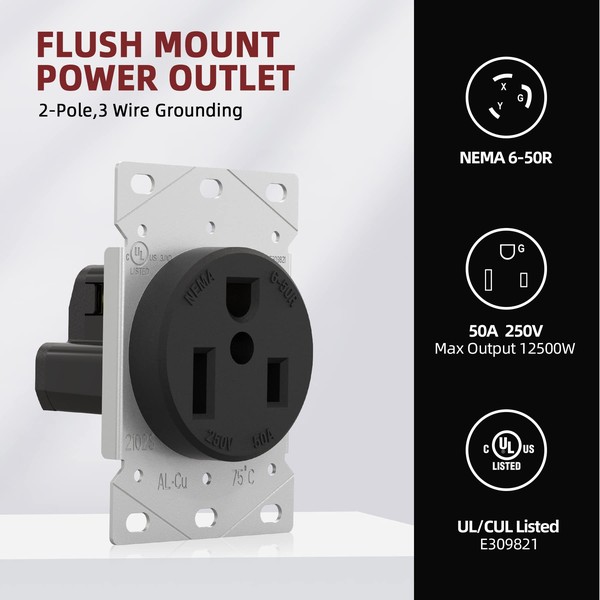
Leviton 5372 50-Amp 250V Flush Mount NEMA 6-50R Receptacle
Best For: Dedicated 240V 50A garage welder circuit drops
Est. Price: $16 - $22
"The industry-standard 240V outlet for dedicated workshop welders, providing bulletproof terminal connections that never overheat."
- +Industry standard NEMA 6-50R three-prong configuration matches all 240V welders
- +Heavy-gauge galvanized steel strap and heavy brass contacts resist heat
- +Accepts up to #4 AWG copper wire securely with massive terminal clamps
- -Requires a two-gang deep metallic electrical box for clean wire bend radius
- -Dedicated 240V circuit must be protected by a two-pole 50A breaker

YesWelder True Color Solar Auto-Darkening Welding Helmet
Best For: Crystal-clear puddle visibility during arc initiation
Est. Price: $55 - $70
"An outstanding optical upgrade that gives beginners incredible weld puddle clarity, eliminating missed seams and accidental arc eye flash."
- +True Color optical technology eliminates the ugly green tint of cheap glass
- +Four independent arc sensors switch from clear to dark in 1/30,000 second
- +Spacious 3.64 x 1.67-inch viewing area lets you see joints clearly before striking
- -Headgear adjustment ratchet requires tightening firmly on smaller head sizes
- -Clear outer replacement lens covers must be kept clean of weld spatter
Powering and Grounding Your Welding Workstation
Before running high-amperage 240-volt welding circuits into your garage, evaluate your electrical distribution system.
Feed your 50-amp welder outlet from a dedicated, code-compliant electrical panel by following our comprehensive guide on wiring a serious garage workshop subpanel.
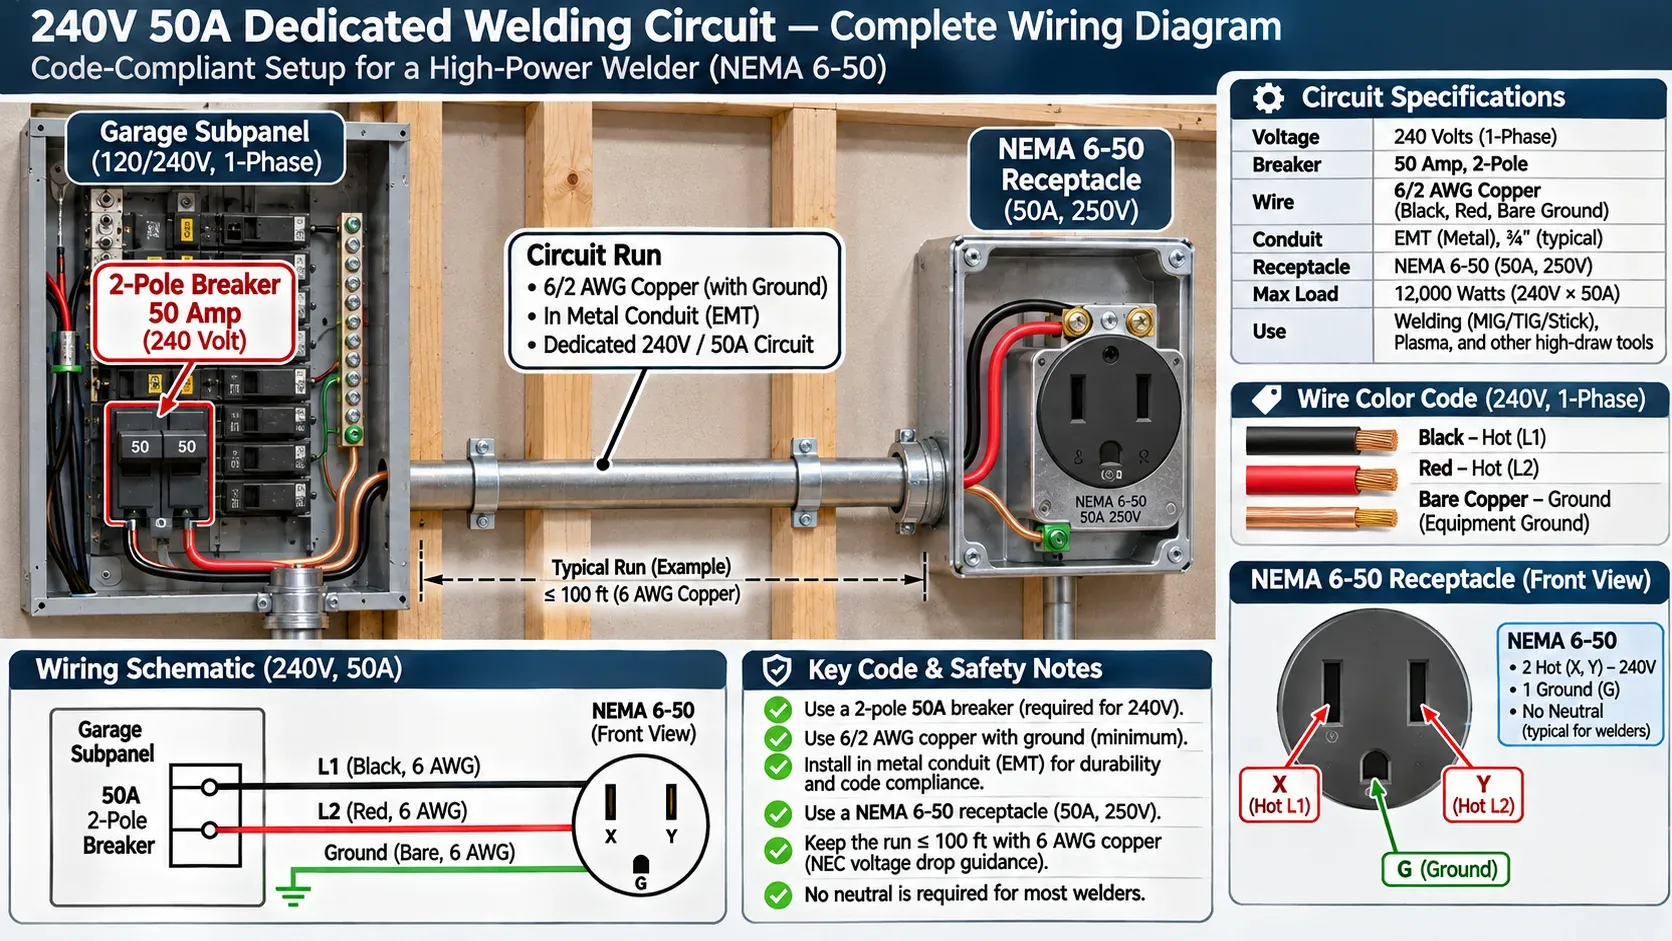
Technical electrical schematic for a dedicated 240V 50-amp welding circuit, showing 2-pole breaker in garage subpanel, 6/2 copper cable run through metal conduit, terminating into a heavy-duty NEMA 6-50 receptacle, clear wiring color codes (black, red, bare ground), clean CAD diagram.
Ensure your welding work pieces rest on a dead-flat, sturdy grounding surface by exploring our construction blueprint for the wobble-free garage workbench.
Hank Miller
Hank is a master craftsman and DIY mechanic based in Ohio. He tests workshop equipment, garage floor coatings, and power tools under brutal, real-world workshop conditions, with zero paid brand sponsorships.