The Wobble-Free Garage Workbench: Why Cheap Metal Benches Fail (And 2 Sturdy DIY Alternatives)

Tired of having your whole workbench shimmy and spill coffee every time you strike a chisel or bend steel in a vise? Here is how to build a rock-solid work surface.
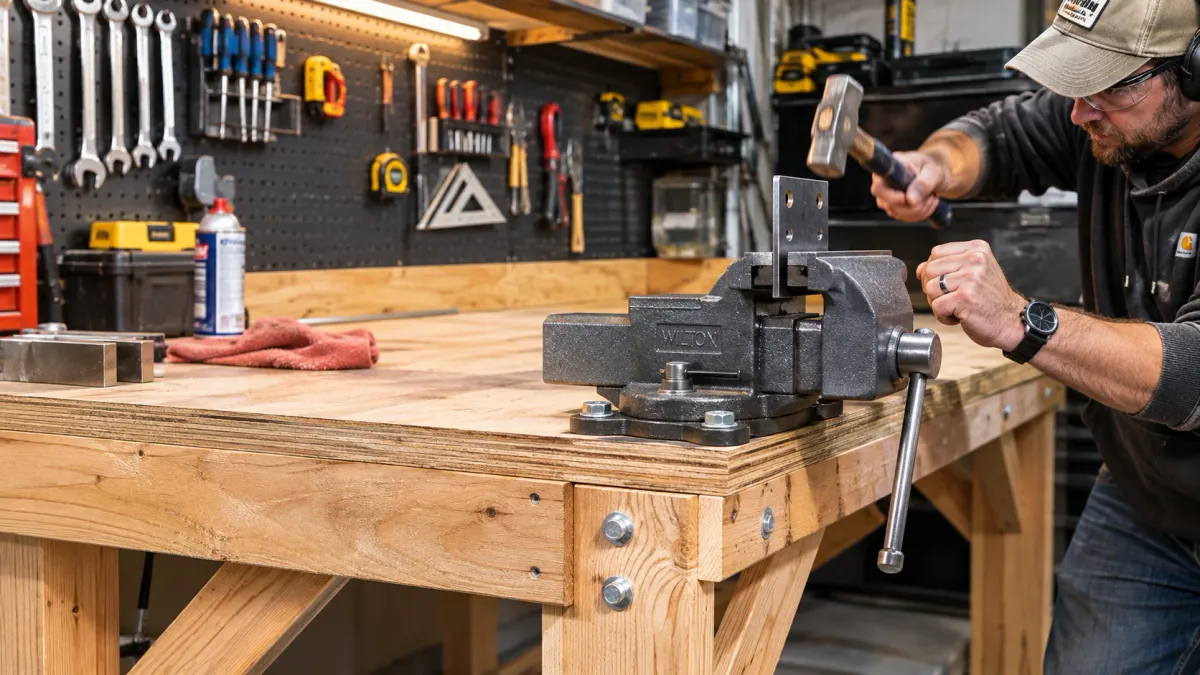
Table of Contents7 Sections
- 01.The Anatomy of a Rigid Workbench: Mass, Triangulation, and Inertia
- 02.Option 1: The $100 DIY Workhorse (2x4s + Plywood Sandwich)
- 03.Option 2: The Commercial Hybrid (Structural Brackets + Hardwood Top)
- 04.Bench Vise Mounting 101: How to Prevent Top Tear-Out
- 05.3 Costly Mistakes That Ruin Garage Workbenches
- 06.The Bottom Line on Workbenches
- 07.Outfitting Your Finished Workbench
You clamp a bent suspension bracket into your newly mounted bench vise, take a firm swing with a three-pound drilling hammer, and instead of steel bending to your will, the entire table flexes like a diving board. Coffee spills off the top shelf, screws rattle across the floor, and the thin stamped-metal legs bow outward under the shock.
Retail home centers love selling bolt-together metal workbenches with glossy powder coat finishes, pegboard backsplashes, and rows of shallow drawers.
In an active shop where you pound bearings, rebuild carburetors, and lean full body weight into breaker bars, those thin sheet-metal tables fail because they lack physical mass and diagonal triangulation. Here is why lightweight benches wobble, along with two rock-solid alternatives you can build in a single Saturday.
Workbench Build Paths Compared
Compare structural rigidity, construction time, and real costs before choosing a bench.
Big-Box Thin Sheet Metal Bench
Light electronics assembly, small craft hobbies, and plant repotting only
- Assembles with basic hand wrenches in 60 minutes
- Includes built-in pegboard
- Wobbles severely under hammer blows
- Mounting a heavy 5-inch vise bends the sheet top
The $100 DIY 2x4 Lumber Workhorse
Mechanics, woodworkers, and fabricators who abuse workbenches daily
- Weighs over 160 lbs
- Deadens hammer impacts
- Supports 2,000+ lbs of engine blocks
- Demands miter saw cuts, cordless drilling, and carrying heavy lumber home from yard
Commercial Bracket Kit + Solid Hardwood Top
Homeowners wanting rock-solid stability without advanced woodworking skills
- Heavy-gauge structural brackets eliminate compound angle cuts
- Perfect 90° joints
- Kit only supplies corner brackets
- You still purchase 2x4s and top lumber separately
The Anatomy of a Rigid Workbench: Mass, Triangulation, and Inertia
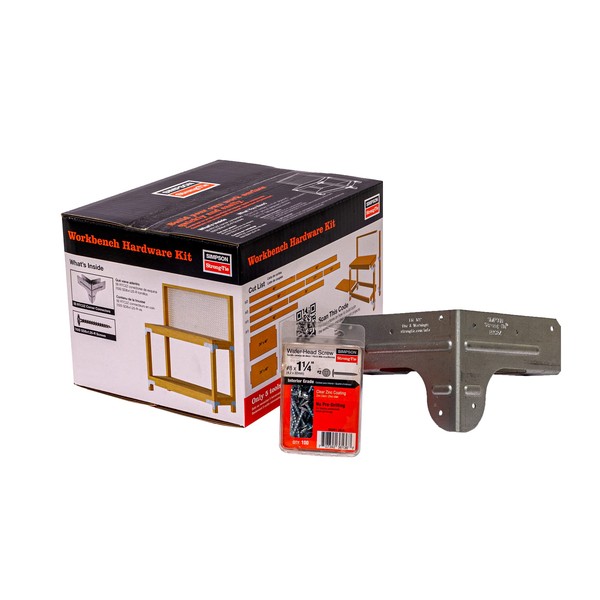
Simpson Strong-Tie RTC2Z Rigid Tie Corner Connectors (Pack of 8)
Best For: Locking 2x4 workbench legs and rails into rigid 90-degree joints
Est. Price: $36.80
"Diagonal racking is what makes wooden workbenches wobble; these heavy steel connectors turn ordinary 2x4 lumber into an earthquake-proof work platform."
- +Heavy 18-gauge galvanized steel creates three-way structural corner joints
- +Eliminates frame racking and diagonal wobble without complex mortise-and-tenon joints
- +ZMAX galvanization resists workshop moisture and winter concrete humidity
- -Requires driving dozens of structural screws per joint (impact driver mandatory)
- -Sharp stamped steel edges require wearing leather work gloves during assembly
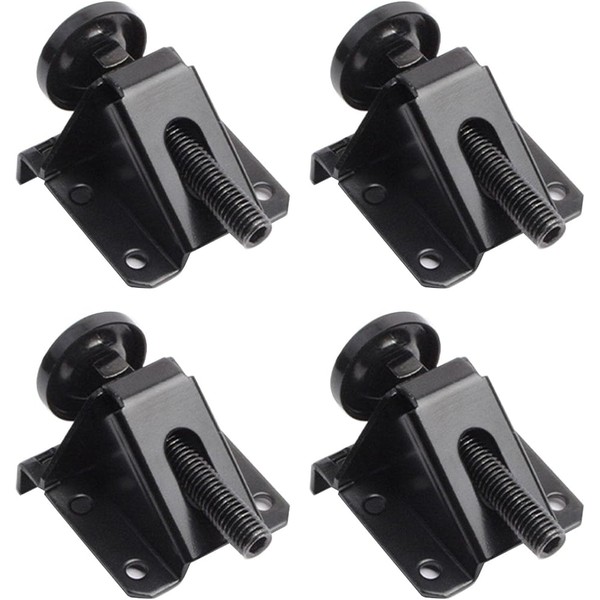
Sworker Heavy-Duty Workbench Leveling Feet (Set of 4, 2,000 lb Capacity)
Best For: Leveling heavy benches on sloping garage floor drainage slopes
Est. Price: $22.99
"Garage slabs slope toward the vehicle door for drainage; these heavy levelers allow you to dial in a dead-flat benchtop on any uneven floor."
- +Heavy-gauge steel L-brackets hook under leg bottoms to transfer load directly into steel
- +Swivel nylon base feet adjust over 2 inches of height to compensate for garage grade
- +Supports up to 2,000 lbs total weight with zero settling or thread stripping
- -Extends leg profile slightly, adding 1/2-inch of width at bench foot perimeter
- -Locknuts must be wrench-tightened firmly once leveled to prevent vibration backing
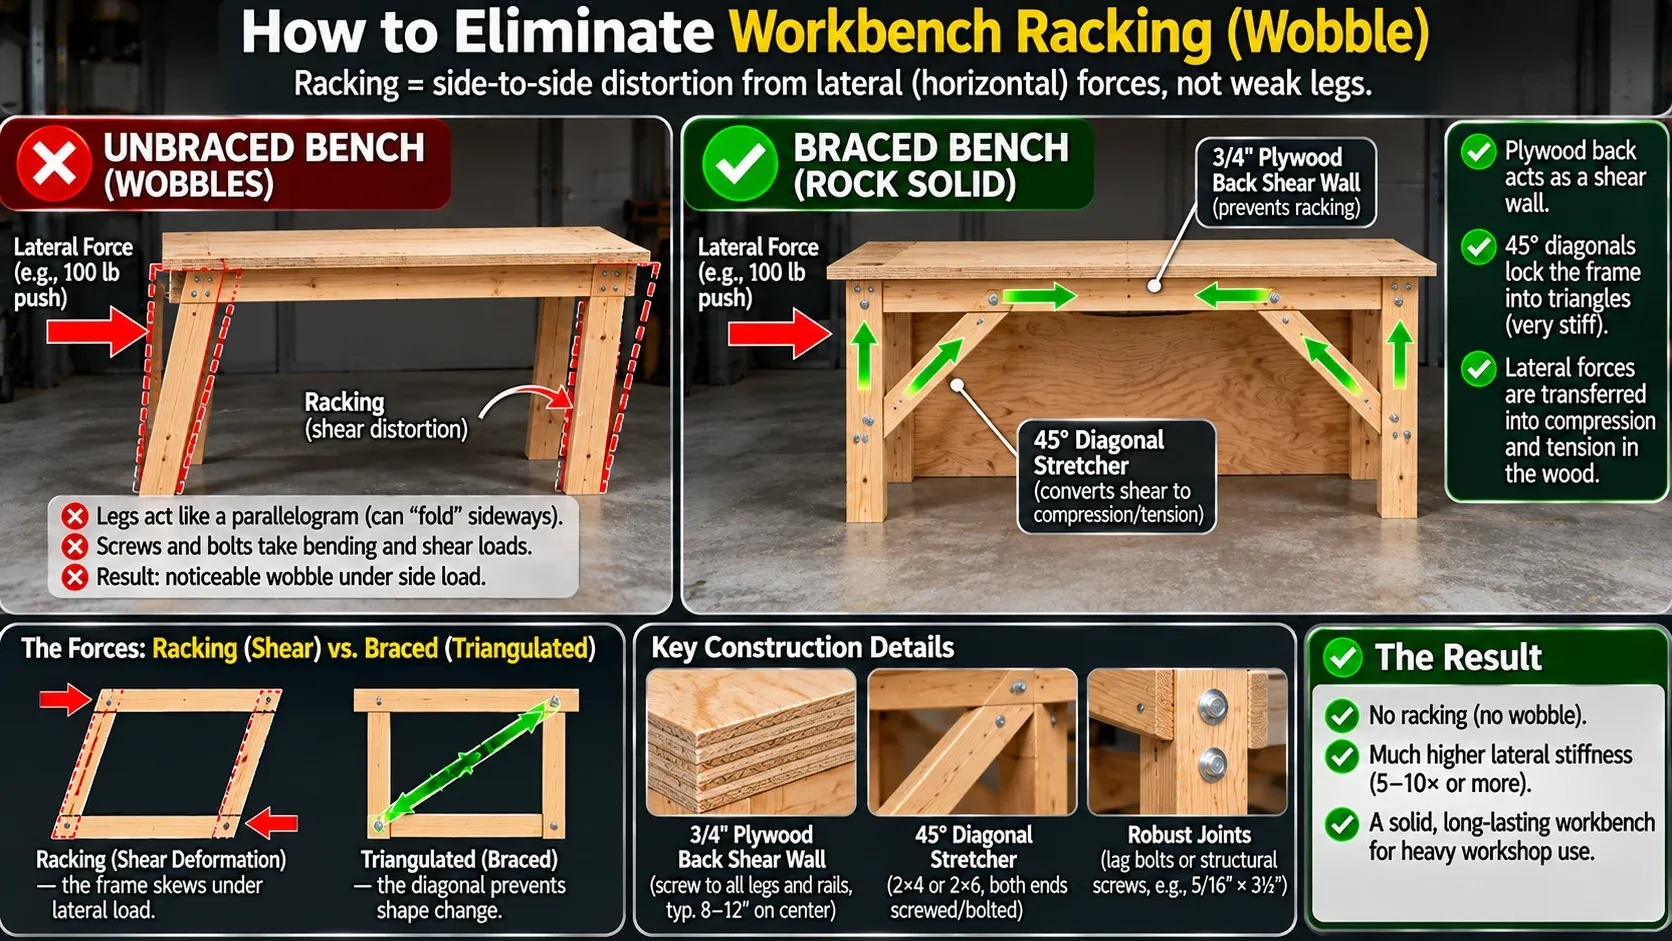
Technical engineering diagram explaining racking forces on a workshop workbench, red directional arrows showing lateral shear forces causing wobble on unbraced legs, green arrows showing how 3/4-inch plywood back shear wall and 45-degree diagonal stretchers eliminate racking completely.
Applying American Institute of Steel Construction (AISC) structural rigidity and bracing guidelines, diagonal gussets and triangulated corner stretchers eliminate racking forces by turning rectangular frame shear into direct axial compression.
A dependable workbench obeys basic principles of physics:
- Structural Mass (Inertia): When you strike a chisel or drive a punch with a hammer, Newton’s third law sends kinetic energy through the tool and into the table. A lightweight 45-pound metal desk absorbs zero energy, bouncing the shock wave right back into your wrist and bouncing parts off the deck. A dense 160-pound wooden workbench absorbs that downward force completely.
- Diagonal Triangulation: Rectangles flex into parallelograms when side loads hit them. Without diagonal gussets or plywood shear panels across the back legs, horizontal pushing forces racking that loosens assembly bolts within three months.
- Top Density: A work surface needs continuous support. Particleboard and thin sheet steel sag under heavy machine parts, while dual-layer laminated plywood or solid birch butcher block provides a rigid anvil face that refuses to cup.
Option 1: The $100 DIY Workhorse (2x4s + Plywood Sandwich)
You can build the most dependable workbench in your neighborhood using eight structural 2x4 boards and one sheet of 3/4-inch exterior-grade plywood.
Build to standard shop dimensions: 6 feet wide, 30 inches deep, and 36 inches high. A 30-inch depth allows you to reach wall-mounted hand tools without bending at the waist, while a 36-inch deck height aligns with your belt buckle, saving lower back strain during long filing sessions.
Follow this rock-solid framing method:
- Build doubled 2x4 legs: Glue and screw two 2x4s face-to-face for each of the four corner legs. Stagger the joints to create built-in shoulder notches that support the horizontal perimeter stretchers directly on solid wood, eliminating reliance on screw shear strength.
- Laminate a sandwich top: Rip a 4x8 sheet of 3/4-inch ACX plywood down the middle. Roll generous amounts of PVA wood glue between both layers and clamp them together using 1-1/4 inch screws driven from the underside. This creates a solid 1.5-inch thick wooden slab that will never bow under hydraulic presses or engine cylinder heads.
- Anchor a 1/2-inch plywood shear back: Screw a full sheet of 1/2-inch plywood across the back legs beneath the bottom shelf. That solid plywood panel locks out 100% of horizontal racking movement without awkward diagonal braces getting in your way.
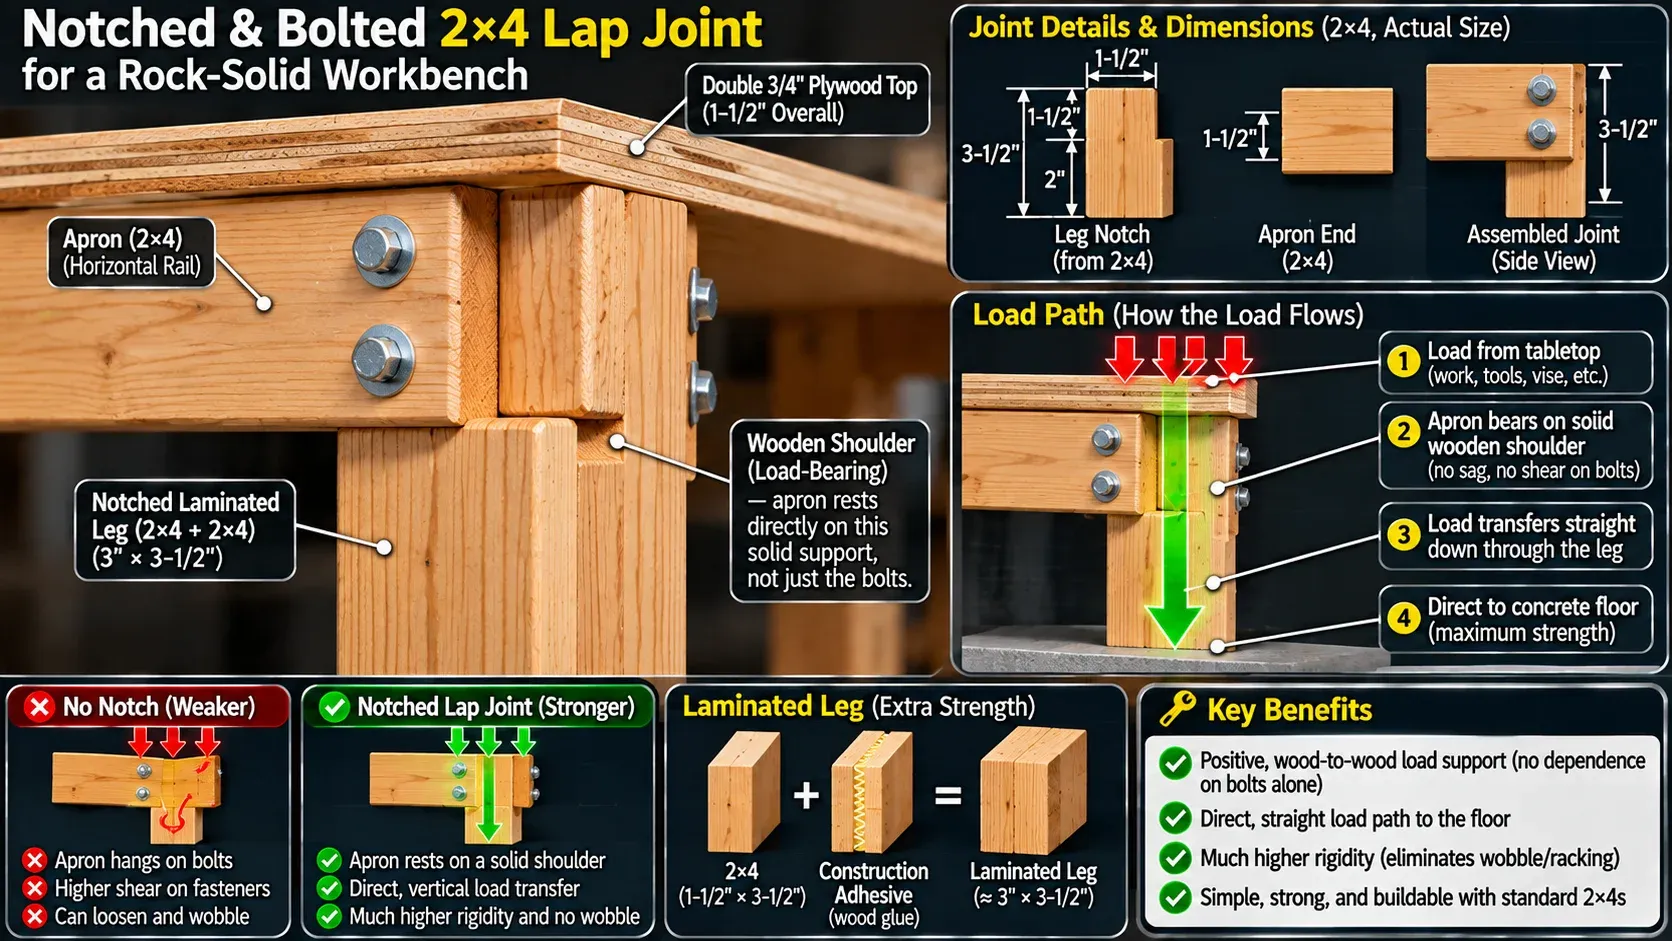
Detailed woodworking joinery diagram showing a notched 2x4 glued and bolted lap joint for workbench legs, horizontal apron resting directly on wooden shoulder of laminated leg, arrows showing vertical load transfer directly to concrete floor, clear CAD blueprint style.
Option 2: The Commercial Hybrid (Structural Brackets + Hardwood Top)
If you lack miter saws or want a foolproof assembly that guarantees square 90-degree corners in forty-five minutes, choose a structural framing bracket system.
These kits supply high-impact structural resin or heavy 13-gauge powder-coated steel corner brackets. You make simple 90-degree crosscuts on straight 2x4s, slide the lumber into the bracket pockets, and drive screws into pre-drilled holes.
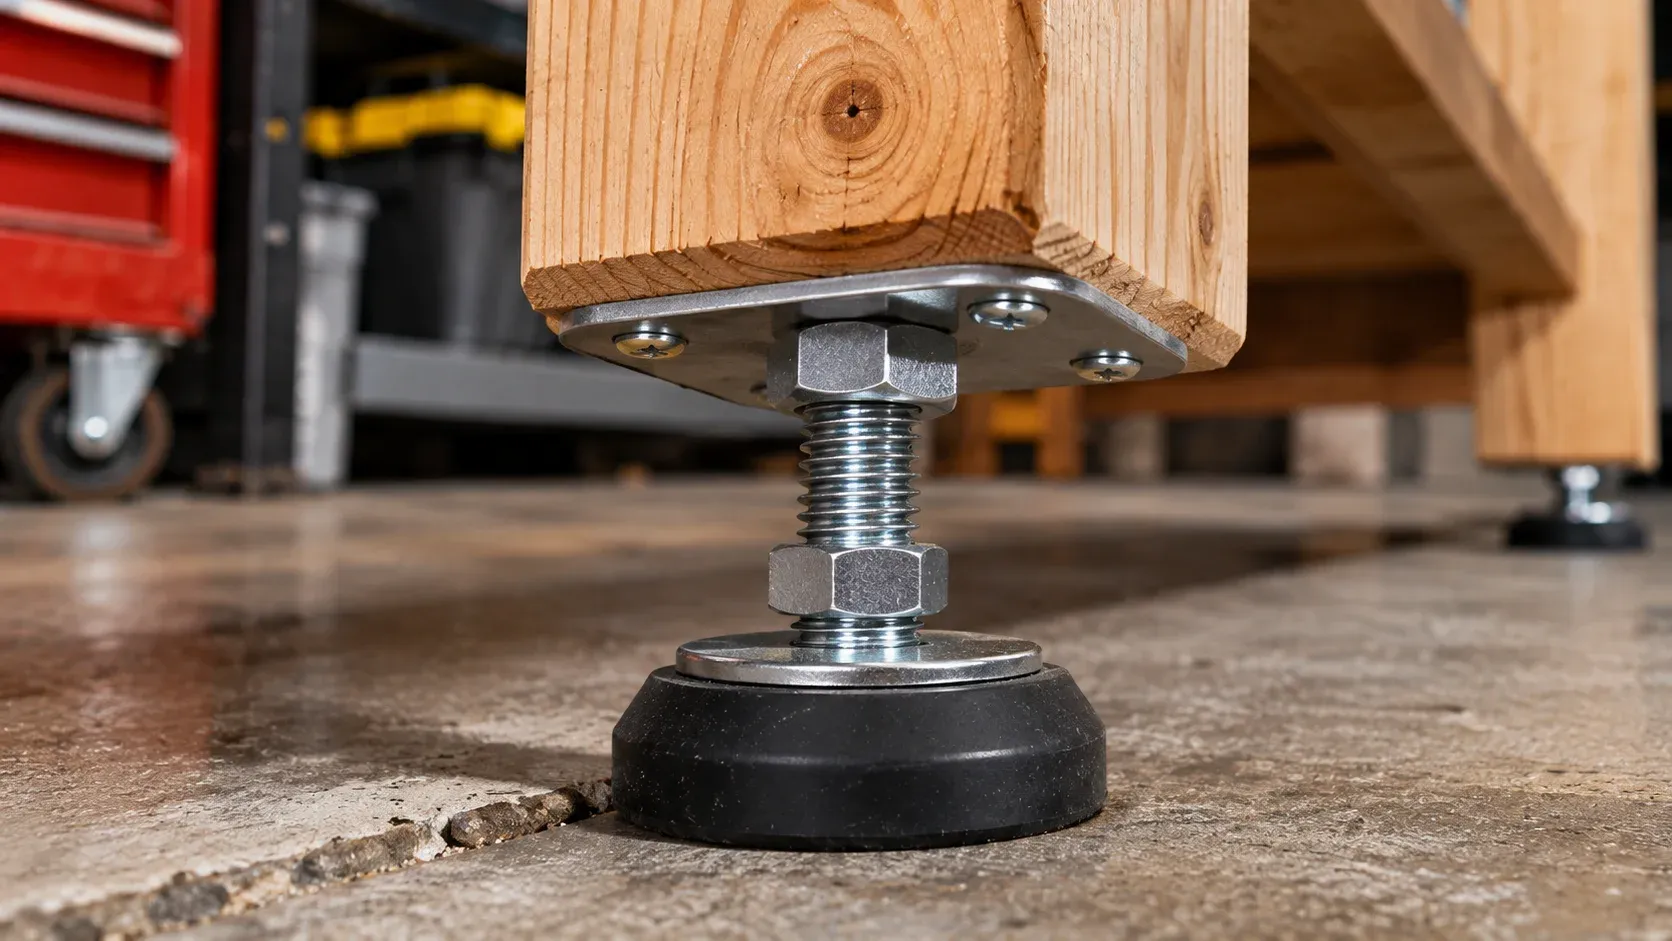
Close-up macro shot of heavy-duty steel leveling foot screwed into bottom of 4x4 wooden workbench leg resting on uneven concrete garage floor, thick rubber anti-vibration base, adjustable threaded hex shaft with jam nut, sharp focus, workshop lighting.
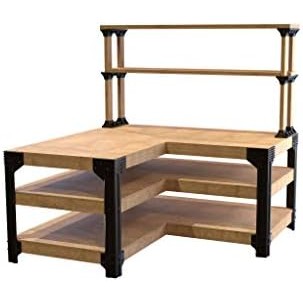
2x4basics Custom Work Bench and Shelving Storage System
Best For: Building custom-sized, heavy-duty workbenches with zero complex carpentry cuts
Est. Price: $74.99
"The easiest route to a heavy-duty shop bench. You assemble rock-solid framing in under an hour without measuring angles."
- +Heavy-gauge structural resin legs support up to 1,000 lbs per corner shelf assembly
- +Pre-engineered 90-degree sockets guarantee square framing with only straight 90° saw cuts
- +Lets you customize total bench length and depth up to 8 feet wide by 4 feet deep
- -Box only includes corner legs and shelf brackets; you supply all lumber and tabletop wood
- -Requires careful wood selection at lumber yard to find straight 2x4s that slide cleanly into pockets
Top this frame with an oiled 1.5-inch solid birch butcher block slab. You gain the beauty of furniture-grade hardwood backed by the structural muscle of thick lumber legs.
Bench Vise Mounting 101: How to Prevent Top Tear-Out
Never mount a cast iron bench vise using wood screws or expanding toggle bolts. The first time you slip a three-foot cheater pipe over your breaker bar to crack a frozen tie rod, upward leverage will rip the screws clean out of the wood grain.
Mount your vise through-and-through using this mechanical sandwich technique:
- Drill all the way through the table: Drill clearance holes completely through your 1.5-inch tabletop using high-speed steel bits.
- Install a steel backing plate beneath the wood: Visit a metal scrap yard or order a 3/16-inch thick by 6x6-inch steel plate. Drill matching holes through this plate and position it directly against the underside of the wooden tabletop beneath the vise footprint.
- Clamp with Grade-5 through-bolts and nylon lock nuts: Pass 1/2-inch Grade-5 hex bolts down through the vise base, through the wooden tabletop, through the steel plate, and cinch tight with nylon-insert lock nuts.
That steel backing plate spreads upward clamping leverage across thirty-six square inches of bottom wood grain, making it physically impossible to rip the vise loose without destroying the entire table.
3 Costly Mistakes That Ruin Garage Workbenches
Avoid these construction errors:
- Building the work surface deeper than 30 inches: Deeper tables turn into clutter catchers where spare aerosol cans and drill bits pile up against the wall, forcing you to bend uncomfortably to reach rear storage racks.
- Ignoring garage concrete drainage slopes: Garage floors slope 1/8-inch per foot toward the overhead door for water drainage. Always install heavy threaded leveling feet on your bench legs to eliminate rocking on sloped concrete.
- Leaving bare wood unprotected against fluids: Unsealed plywood drinks motor oil, brake fluid, and battery acid like a sponge, rotting interior glue layers. Seal your wooden tabletop with three coats of boiled linseed oil or penetrating Danish oil so chemical spills wipe clean with a shop rag.
The Bottom Line on Workbenches
Throw away the flimsy metal catalog desks that shake every time you tap a hand plane.
Grab eight straight 2x4s, glue together two layers of 3/4-inch plywood, and screw a solid shear panel across the rear legs. For around $100 and a morning of honest carpentry, you will build a rock-solid workstation that handles every heavy project for the next thirty years.
Outfitting Your Finished Workbench
Once your bench is bolted tight and leveled, equip the work surface with proper fabrication tools.
Anchor a rugged vise over a structural leg using our technical buying guide on bench vises: forged steel vs. cast iron.
For precision hand tool work, maintain hair-splitting chisels right at your station with our guide on how to sharpen woodworking chisels with diamond stones.
To prevent humidity from rusting tools stored in bench drawers, implement the vapor barriers in how to keep tools from rusting in a toolbox.
And organize your hand tools within easy arm reach by mounting modular wall racks from our guide on wall storage: pegboard vs. slatwall vs. French cleat.
Hank Miller
Hank is a master craftsman and DIY mechanic based in Ohio. He tests workshop equipment, garage floor coatings, and power tools under brutal, real-world workshop conditions, with zero paid brand sponsorships.