The Garage Door Insulation Trap: Why Added Weight Ruins Springs (And the Best Cold-Climate Kits)

Slapping cheap foil on a cold steel door fails in deep winter. Learn why conductive EPS panels beat radiant foil, and why added weight destroys opener gears without a spring balance test.
Table of Contents5 Sections
You place your bare palm against the interior sheet metal of your garage door on a fifteen-degree January morning, and it feels like pressing your hand against the inside of a commercial chest freezer. You run a five-thousand-watt electric heater non-stop, but your workshop air remains bone-chillingly cold because that uninsulated 24-gauge steel door acts as a massive thermal radiator dumping heat directly into the street.
Homeowners respond by buying forty-dollar rolls of shiny silver bubble foil on the internet, taping them across the door panels, and expecting instant comfort. Four months later, the tape has failed, the panels are falling onto the hood of their car, and their electric opener is groaning under heavy mechanical strain because nobody accounted for the physics of torsion spring counterbalance.
I serviced commercial overhead doors and heated residential fabrication bays for decades. In this guide, I expose the scientific difference between radiant foil and conductive foam, explain how twenty pounds of insulation can destroy your electric opener, and provide the mandatory three-stage door balance test you must run after insulating.
Radiant Barrier vs. Rigid Foam: The Climate Lie
Walk through home improvement forums, and you will see dozens of homeowners singing the praises of thin radiant barrier bubble wrap. Online listings often market these shiny silver rolls with exaggerated thermal claims of R-8 or higher.
Radiant barriers operate on a single principle: reflecting infrared electromagnetic heat radiation. A radiant barrier works wonders on a blistering July afternoon in Phoenix when radiant sunshine beats down directly onto a west-facing dark steel door.
In freezing northern winter climates, heat loss occurs through conduction and convection, not radiant emission. Warm air generated by your workshop heater touches the cold steel door, conducts straight through the thin metal skin, and dissipates into the outdoor wind.
A thin sheet of metallic foil provides virtually zero conductive resistance (delivering an actual thermal rating under R-1.5). To stop winter heat loss, you need physical density: closed-cell Expanded Polystyrene (EPS) or high-density fiberglass batting measuring 1.25 to 1.5 inches thick that traps air molecules inside millions of microscopic cells.
The 20-Pound Trap: Why Your Garage Door Opener Will Burn Out
The Door & Access Systems Manufacturers Association (DASMA Technical Data Sheet 155) specifies that an electric garage door opener should only guide a properly counterbalanced door, never lift dead uncompensated weight.
An automatic garage door opener does not lift the full dead weight of your door through raw motor power. An opener motor is engineered merely to push and pull a door that is already balanced by overhead torsion springs.
When calibrated properly, the high-tensile steel springs above your door carry 98 percent of the door’s 150-pound mass. When you add a heavy DIY insulation kit, you add between fifteen and twenty-five pounds of dead weight directly to the door face.
Because that weight is added across the vertical panel faces, the door becomes bottom-heavy. Every time you press the wall button, the electric opener motor must lift an extra twenty pounds of deadweight off the concrete slab.
Modern openers feature a soft nylon drive gear inside the powerhead casing. Forcing that small plastic gear to deadlift twenty unbalanced pounds on every cycle grinds the gear teeth down to fine white powder within eighteen months, leaving your motor spinning helplessly while the door remains shut.
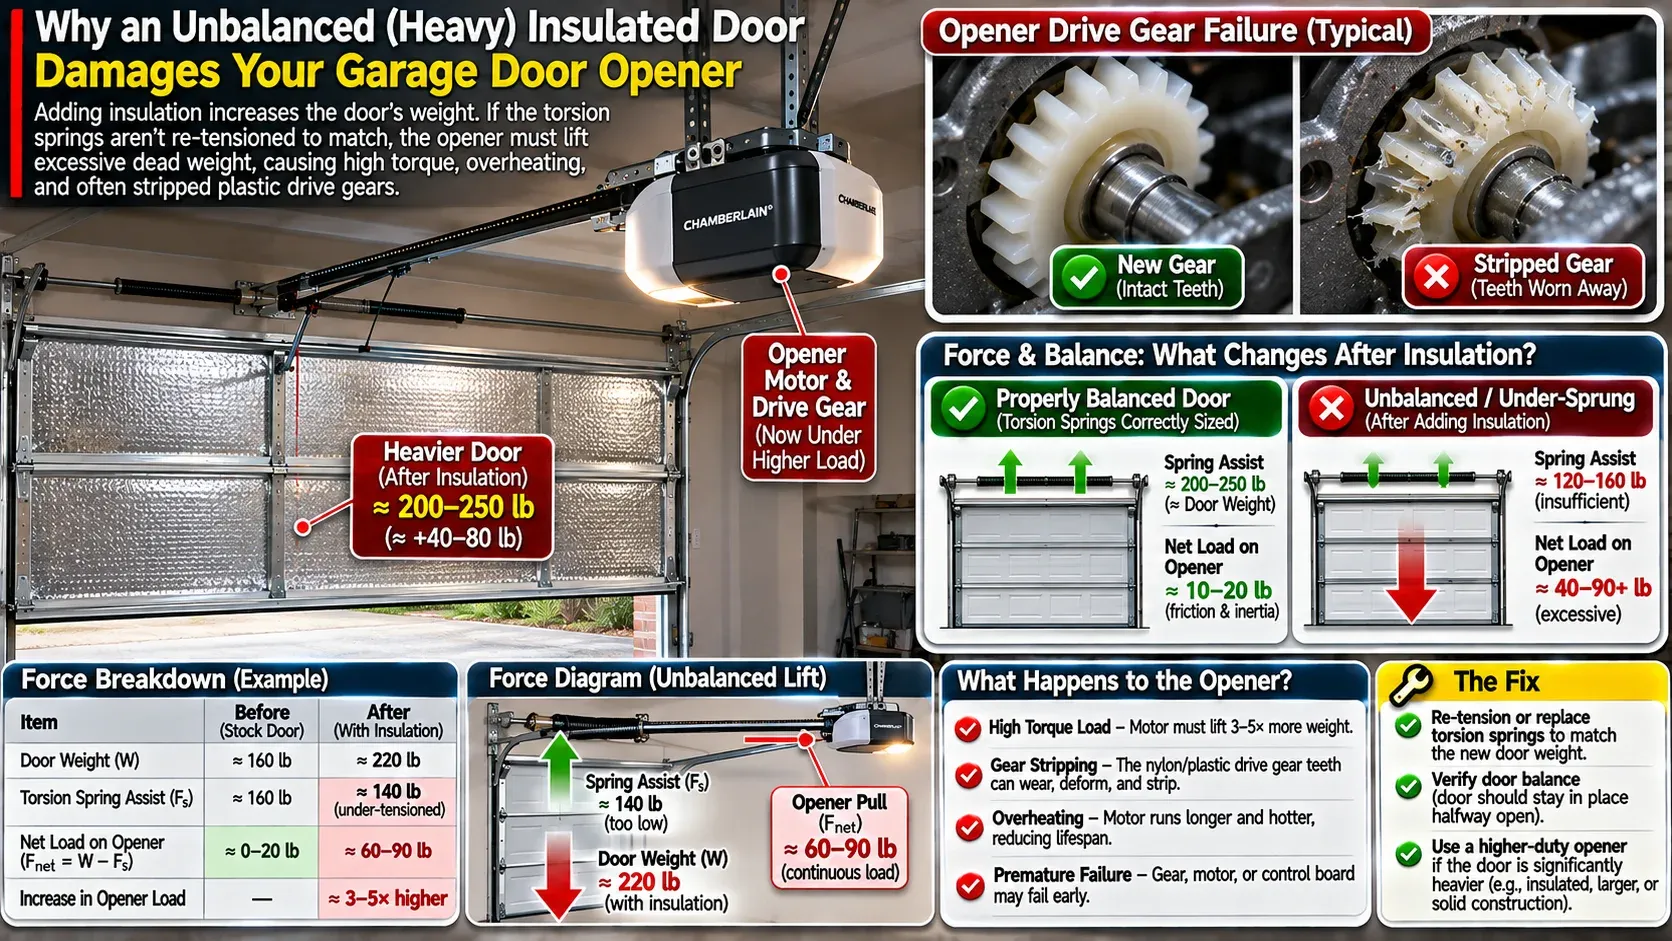
Technical mechanical diagram showing stress on a garage door opener motor caused by an unbalanced heavy insulated door, showing plastic drive gear teeth stripping under excessive dead weight, force vectors showing torsion spring assist deficiency, clear educational illustration.
The 3-Stage Garage Door Balance Test: Verifying Counterbalance After Insulating
Execute these manual checks to ensure your torsion springs carry the extra insulation weight safely.
Lift door by hand to waist height (3 to 4 feet off floor) and release; door stays perfectly suspended
Releasing door at waist height causes the door to drop and slam hard against the concrete floor
Releasing door at waist height causes the door to snap upward toward the ceiling tracks
What to Do When Your Insulated Door Fails the Balance Test
If adding rigid foam panels makes your door slam down hard from waist height, your single spring cannot handle the load. Read my detailed guide on converting from a single torsion spring to dual springs to calculate correct wire diameter and inner diameter sizing safely.
If your newly insulated door fails the waist-height balance test and crashes to the floor, you cannot leave the automatic opener connected.
Disconnect the opener arm and evaluate your mechanical options. Sectional doors equipped with overhead torsion springs can frequently regain balance by adding one or two quarter-turns of winding tension to each spring.
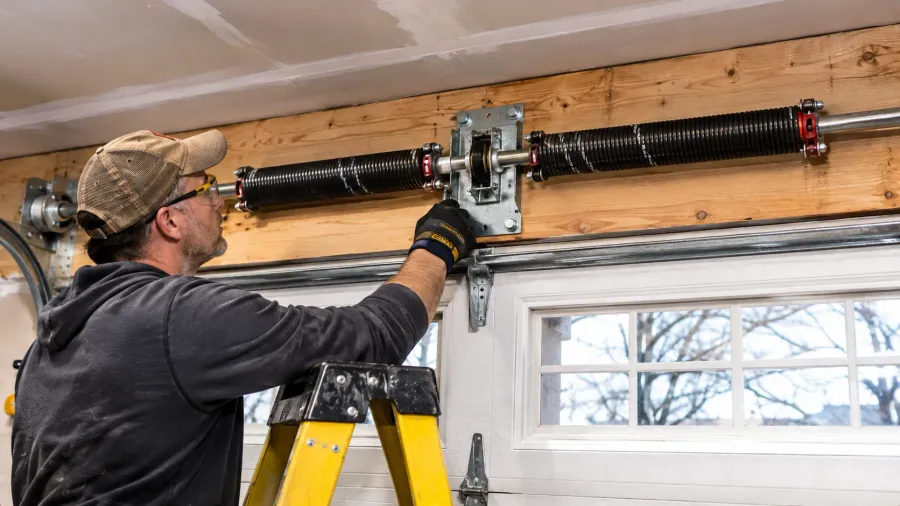
You must treat this mechanical adjustment with extreme caution. The high-tension steel torsion springs mounted on the header bar store enough explosive torsional force to break wrists or shatter fingers if a tool slips out of the winding cone.
Never attempt to wind or unwind a torsion spring using screwdrivers, punches, or adjustable wrenches. You must purchase a matched pair of half-inch solid cold-rolled steel winding bars measuring eighteen inches long.
Insert the bottom bar fully into the winding cone socket, maintain upward physical control with one hand, loosen the two hardened set screws, insert the second bar into the adjacent socket, and advance the spring upward one notch at a time. If your door features side-mounted stretch extension springs, or if your torsion springs are over ten years old, call an experienced door technician to install heavier-rated springs.
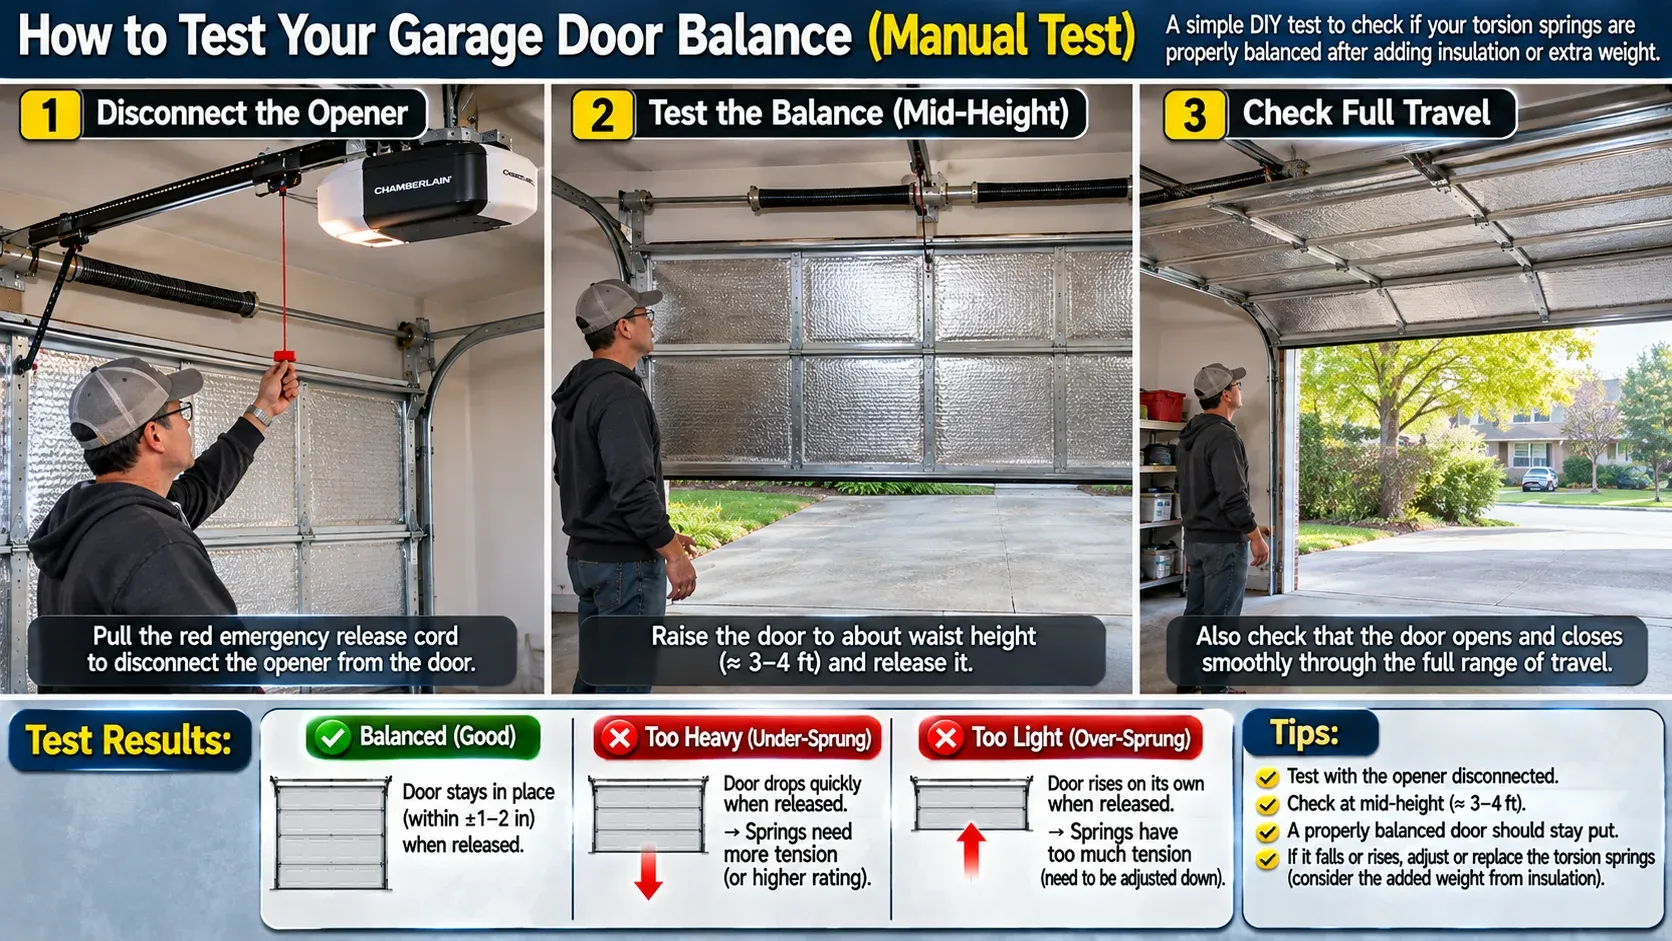
Three-panel step-by-step photography demonstrating manual garage door balance testing: panel 1 pulling red emergency release cord, panel 2 raising door to waist height and releasing hands showing door hovering stationary, panel 3 fully open position, clear instructional DIY sequence.
Garage Door Insulation Methods: Reflective Foil vs. Rigid Kits vs. Factory Doors
Comparing true conductive R-values, weight impact, installation time, and long-term durability.
Radiant Barrier Bubble Foil Rolls
South-facing garages in desert climates for summer cooling
- Lightweight
- Adds almost zero weight to door assembly
- Provides virtually zero warmth in sub-freezing winter climates
Rigid High-Density EPS Kits (Matador)
Northern unheated workshops and attached garage living space
- R-4.8 true conductive rating
- Snaps into steel panel channels without glue
- Adds roughly 16 pounds to door
- Demands mandatory balance test
Factory Injected Polyurethane Sandwich Door
Fully finished heated garages and severe winter regions
- Maximum R-12 to R-18 thermal envelope with immense structural rigidity
- Substantial capital investment compared to DIY foam kits
Top Cold-Climate Insulation Kits That Don’t Fall Off
If you choose to insulate your existing steel pan door, avoid generic foam board kits that rely on cheap double-sided adhesive tape. Summertime solar heating can bake the outer steel door face to 140 degrees Fahrenheit, melting standard adhesives and dropping the insulation onto your floor.
The most reliable DIY solution is the Matador Garage Door Insulation Kit. Matador panels utilize dense Expanded Polystyrene faced with a bright white high-impact polystyrene plastic shell that resists punctures and wipes clean easily.
Each panel features a factory-scored kerf cut along the back. You bow the board in the middle, slide the outer edges beneath the steel horizontal panel ribs, and push the center flat. The natural spring tension of the curved foam locks the panel mechanically inside the door frame without any chemical adhesives.
For commercial-grade thermal performance, the Owens Corning Fiberglass Kit provides a true R-8 rating using pre-faced vinyl blankets secured by heavy plastic retention pins. These pinned brackets anchor mechanically to the steel stiles, preventing sag through years of continuous door cycling.
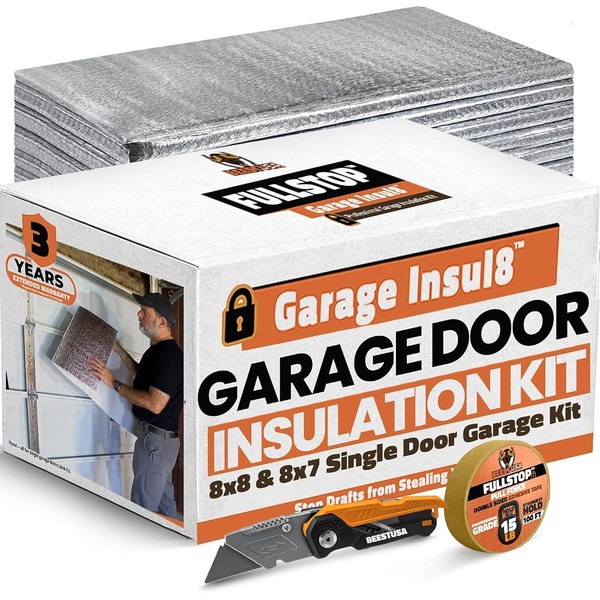
Matador Garage Door Insulation Kit for 8-Foot Doors
Best For: Single-car bays requiring clean, tape-free snap installation
Est. Price: $110 - $130
"The cleanest, most professional DIY rigid panel kit on the market, snapping into place securely without falling down."
- +Delivers true R-4.8 conductive thermal insulation in freezing weather
- +Pre-scored panels flex into door channels with zero messy adhesives
- +Glossy white plastic face brightens workshop lighting significantly
- -Adds approximately 16 pounds of weight to a standard single door
- -Requires careful trimming around central reinforcing stiles
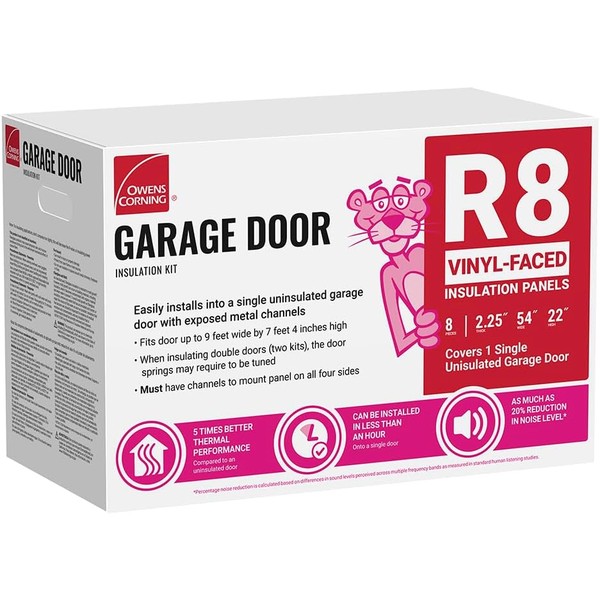
Owens Corning Garage Door Insulation Kit (R-8)
Best For: Severe northern winter climates seeking maximum heat retention
Est. Price: $95 - $115
"The highest true R-value retrofit kit available for home garages, turning freezing steel doors into warm thermal barriers."
- +Delivers genuine R-8 conductive insulation for heated garages
- +Heavy vinyl facing resists shop impacts and cleans with soap and water
- +Mechanical snap-locking retention pins prevent panels from sagging
- -Fiberglass core demands gloves, dust mask, and long sleeves during install
- -Slightly puffier appearance than rigid plastic-faced foam panels
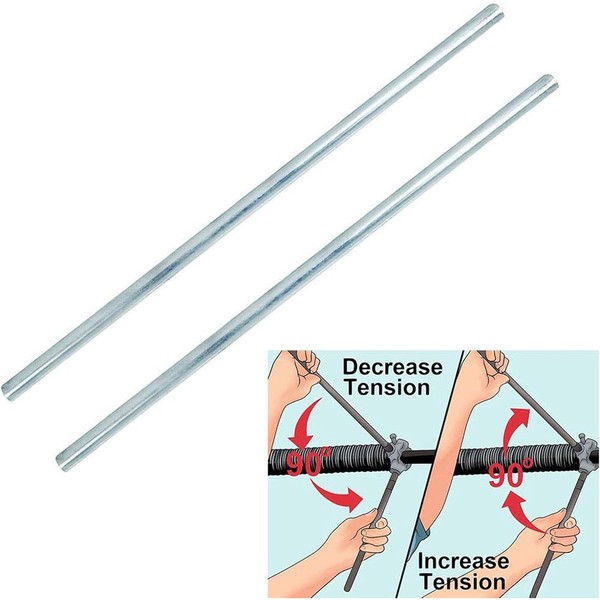
1/2-Inch x 18-Inch Solid Steel Torsion Spring Winding Bars (Pair)
Best For: Safely adjusting torsion spring counterbalance tension
Est. Price: $16 - $22
"An inexpensive, mandatory safety tool that prevents catastrophic slip injuries when adjusting overhead door spring tension."
- +Machined from solid cold-rolled steel with exact 1/2-inch outer diameter
- +18-inch length provides ample mechanical leverage to control spring force
- +Knurled non-slip handle sections prevent greasy gloves from slipping
- -Only for use by individuals who thoroughly understand spring mechanics
- -Must be seated fully to the bottom of the winding socket on every turn
Completing Your Garage Weather Barrier
Insulating your door panels stops conductive heat loss through the center of the door, but you must seal the perimeter to eliminate drafty air leaks.
Stop freezing rainwater and winter drafts from blowing under your bottom door panel with our installation guide on how to stop water coming under your garage door.
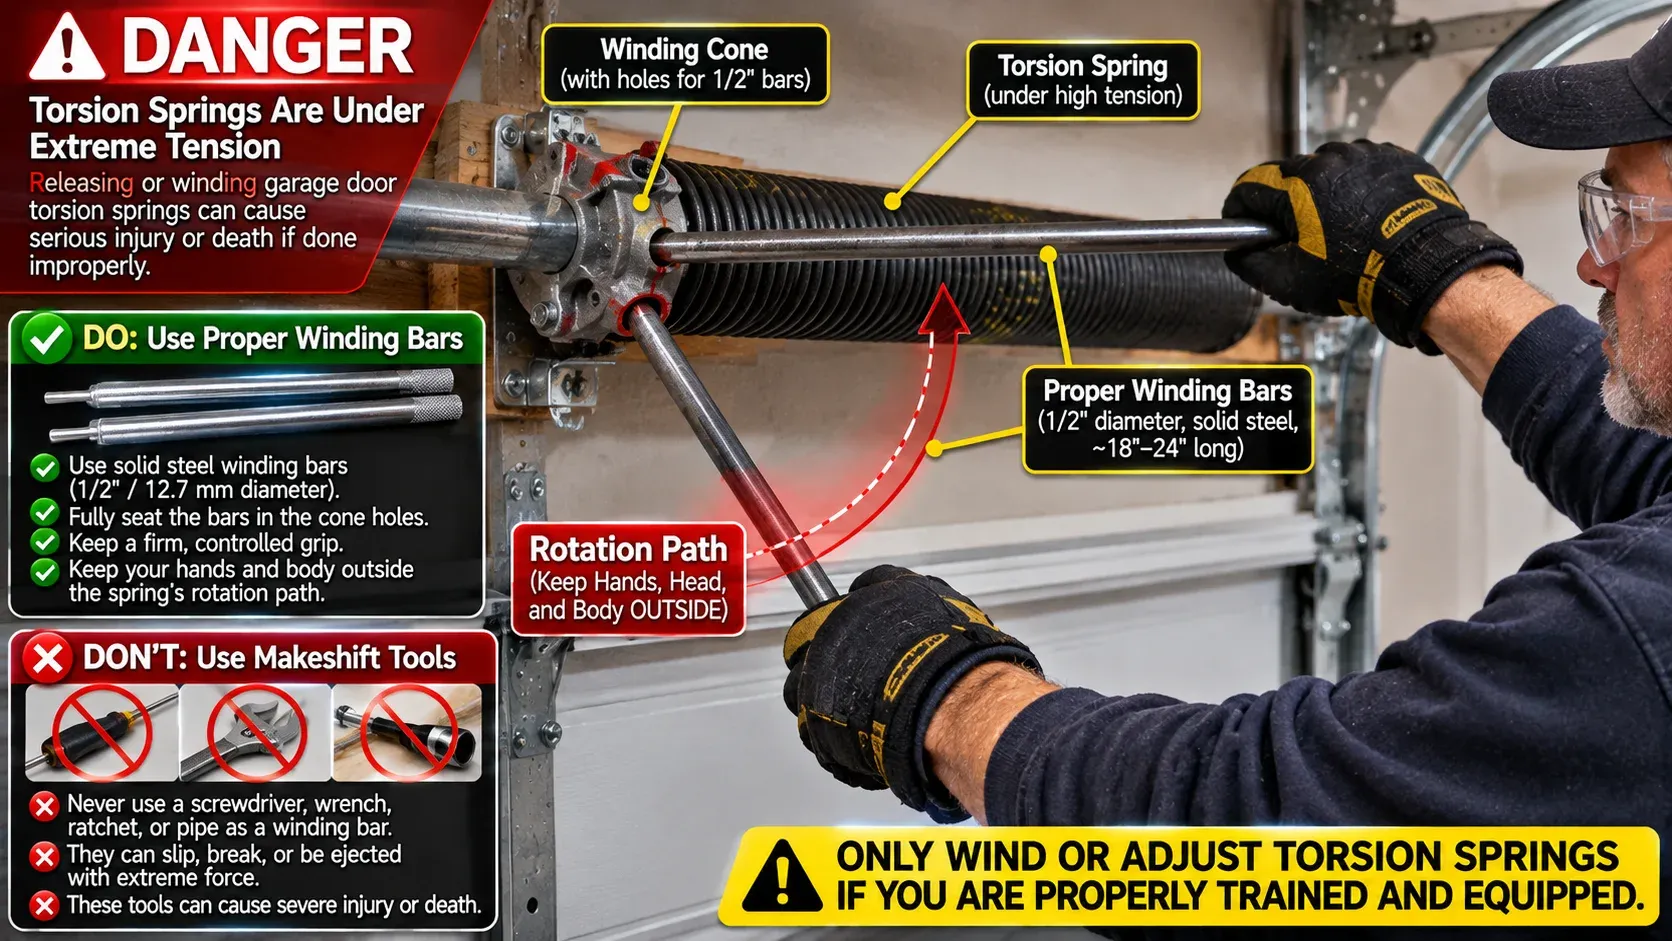
Extreme safety warning technical photo of garage door torsion spring winding cone, showing proper dual solid steel 1/2-inch winding bars fully seated in collar holes with technician hands gripping outside rotational path, bold red warning callout prohibiting screwdrivers or makeshift tools.
Once your door holds heat effectively, calculate your heating equipment requirements using our winter heating breakdown on heating an uninsulated garage with mini-splits vs. 240V electric.

Hank Miller
Hank is a master craftsman and DIY mechanic based in Ohio. He tests workshop equipment, garage floor coatings, and power tools under brutal, real-world workshop conditions, with zero paid brand sponsorships.