Single vs Dual Garage Door Torsion Springs: Why Builders Cut Corners and How to Convert to High-Cycle

Builders install cheap single torsion springs to save thirty dollars per house. Here is why converting to dual high-cycle springs protects your opener and keeps your family safe.
Table of Contents6 Sections
- 01.The Builder’s Secret: Why Single Springs Exist on 16-Foot Doors
- 02.The Dual Spring Advantage: Balance, Redundancy, and Longevity
- 03.10,000 vs. 30,000 Cycles: The High-Cycle Mathematics
- 04.Safety First: The Non-Negotiable Rules of Torsion Springs
- 05.Measuring Your Door for Dual Spring Conversion
- 06.Step-by-Step Conversion and the 3-Foot Balance Test
It is 6:45 AM on a freezing Monday morning. You buckle your kids into the back of your SUV, start the engine, and press the garage door remote on your visor.
A deafening bang, loud as a twelve-gauge shotgun blast, echoes through the garage. Metal shrapnel clatters against the drywall ceiling. The electric opener jerks violently upward, emits a sharp grinding squeal, and dies with a whiff of scorched plastic.
You step out of the car and look up. The single torsion spring mounted above your sixteen-foot garage door snapped cleanly in two, leaving a jagged two-inch gap between coils.
You grab the emergency manual release cord, pull the red handle, and try to lift the door by hand. The heavy steel door feels like solid granite. You cannot lift it an inch off the floor. Both family vehicles are trapped inside, your electric opener gears are stripped, and you are late for work.
This failure happens in thousands of subdivisions every winter. It happens because commercial home builders install single-spring setups on heavy double-car doors to save thirty-five dollars.
Here is why single springs fail, how a dual-spring conversion provides crucial redundancy, and how to upgrade to a 30,000-cycle setup that lasts for decades.
Hank's Bottom Line on Torsion Spring Upgrades
- Single torsion springs on 16-foot doors are a builder shortcut that traps your cars when the spring snaps.
- Dual-spring conversions balance rotational torque evenly across both cable drums, preventing door binding and motor gear wear.
- Upgrading from 10,000-cycle 0.225-inch wire to 30,000-cycle high-grade springs extends lifespan from 7 years to 20+ years.
- Only use dedicated 1/2-inch round steel winding bars, never screwdrivers or rebar pins.
The Builder’s Secret: Why Single Springs Exist on 16-Foot Doors
When track home builders construct a subdivision of five hundred houses, purchasing agents scrutinize every line item.
To counterbalance a standard sixteen-foot wide, seven-foot tall double-car garage door weighing 160 to 200 pounds, a proper mechanical system requires two balanced torsion springs mounted symmetrically across a center bearing bracket.
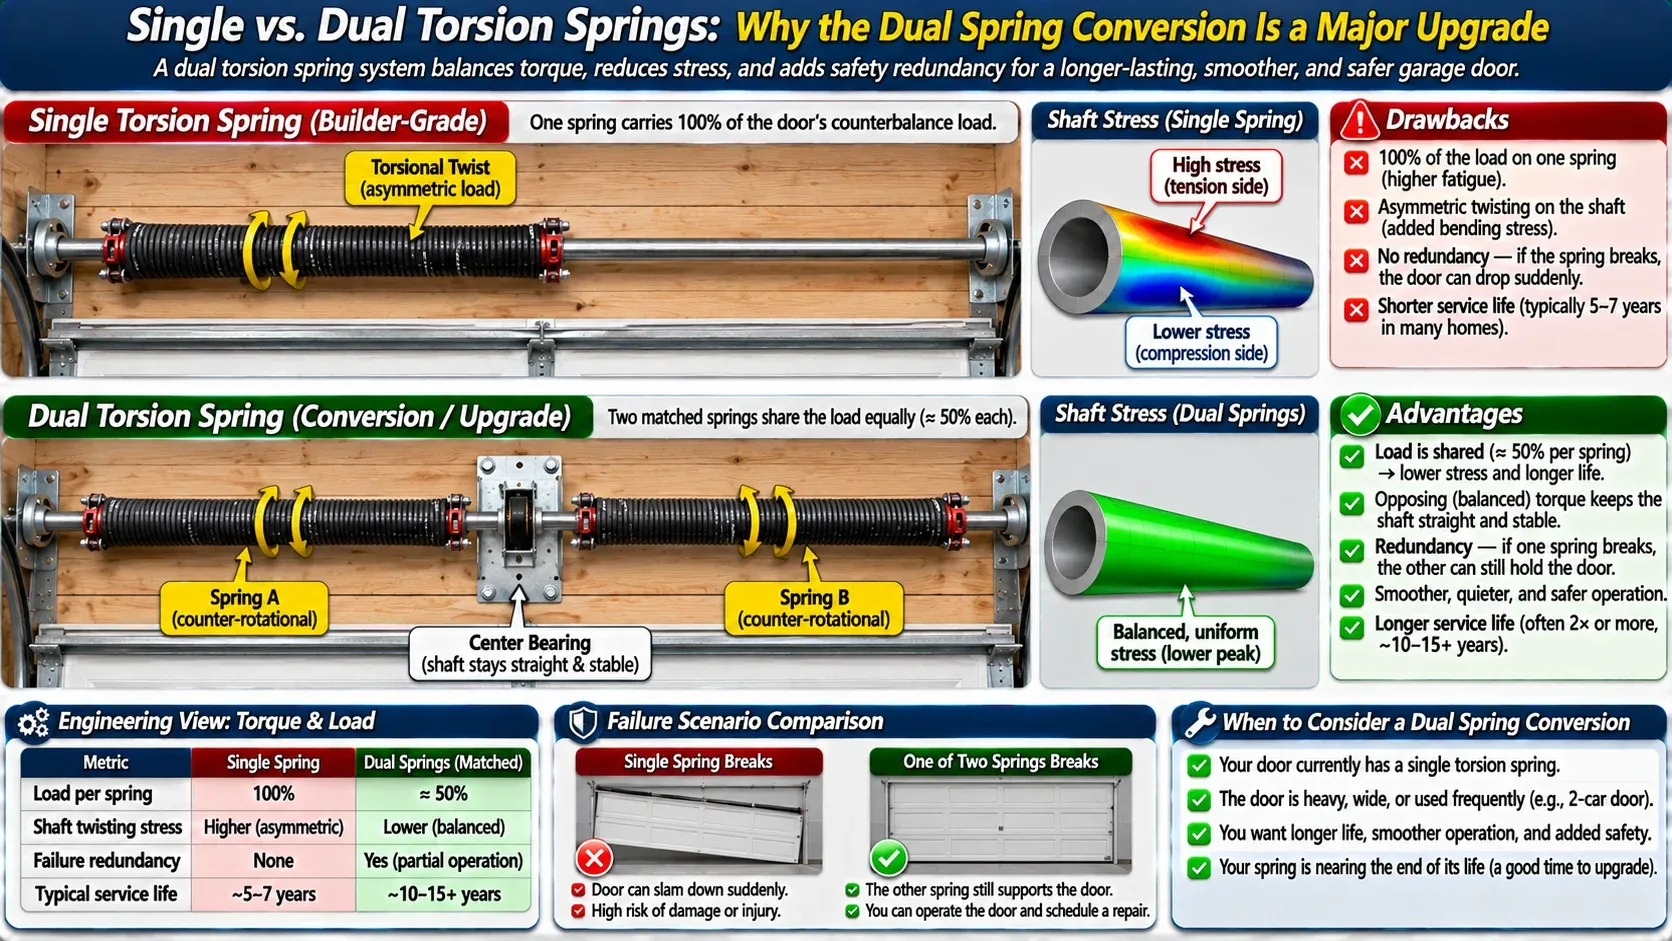
Technical engineering diagram comparing builder-grade single torsion spring vs dual torsion spring conversion, showing asymmetric torsion twisting stress on single spring shaft vs balanced dual counter-rotational springs sharing load evenly, safety failure redundancy callouts, clean CAD illustration.
By eliminating the second spring, omitting a stationary cone bearing, and saving fifteen minutes of technician labor per house, the builder saves roughly $35 per garage. Multiplied across five hundred homes, that single corner-cut generates $17,500 in pure corporate margin.
However, that single spring creates continuous mechanical compromises:
- Shaft Deflection and Binding: A single spring mounted on one side of the center bracket exerts continuous asymmetric torque along the one-inch hollow steel tube. This torsional deflection pulls the shaft out of alignment, causing premature bearing failure and noisy metal-on-metal rubbing.
- Zero Safety Redundancy: When that single spring snaps under metal fatigue, the counterbalancing force drops from one hundred percent to zero in a tenth of a second. The door becomes dead deadweight.
- Opener Gearbox Destruction: If the spring snaps while an automatic opener is lifting the door, the electric motor suddenly experiences a 180-pound shock load. The plastic nylon drive gear inside your Chamberlain or LiftMaster opener strips out instantly, adding a costly motor rebuild on top of your spring repair.
The Dual Spring Advantage: Balance, Redundancy, and Longevity
Converting your sixteen-foot door to a dual-spring configuration resolves these design flaws through simple mechanical physics:
- Symmetrical 50/50 Load Sharing: A dual-spring system features a left-wound spring (marked with red paint) mounted to the right of center and a right-wound spring (marked with black paint) mounted to the left of center. The opposing winding vectors cancel out lateral shaft twist, keeping your drive tube completely straight and quiet.
- Fail-Safe Emergency Redundancy: Torsion springs inevitably succumb to cyclic metal fatigue. However, two springs will virtually never break simultaneously. When one spring snaps, the second spring continues counterbalancing fifty percent of the door mass. The door will not crash downward, and an average adult can easily lift the remaining weight by hand to back vehicles out of the garage.
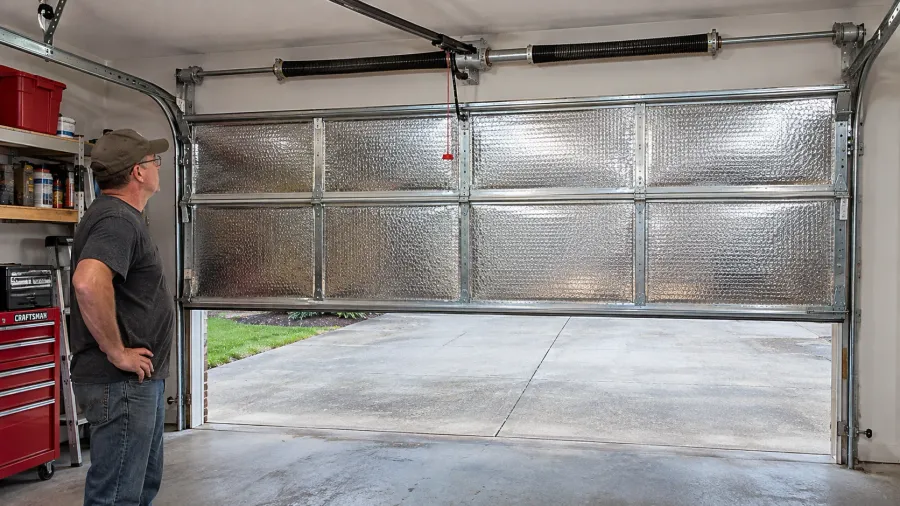
- Extended Opener Motor Life: Balanced dual springs deliver smooth, linear lifting torque from floor to ceiling. Your electric opener only works against three to five pounds of residual friction, prolonging gear life and eliminating annoying chain slap. If you recently added insulation panels to your door, review our guide on garage door insulation weight and spring balance.
Torsion Spring Configuration Comparison
Single Spring (Builder-Grade 10k)
Dual Springs (Standard 10k)
Dual High-Cycle Springs (30k+)
10,000 vs. 30,000 Cycles: The High-Cycle Mathematics
DURA-LIFT Heavy-Duty Center Support Bearing Bracket for Torsion Shafts
Best For: Supporting the center stationary cones and torsion tube in dual-spring conversions
Est. Price: $14.99
"When converting from a single spring to dual springs, both stationary spring cones bolt together onto this center bracket; never reuse an old worn-out plastic center bushing."
- +Stamped 11-gauge steel bracket resists high rotational and dead torsion loads
- +Pre-installed sealed ball bearing reduces friction on the 1-inch torsion shaft
- +Universal mounting holes anchor firmly to wooden spring header pads
- -Must be anchored squarely into solid 2x6 header framing with two 5/16" structural lags
- -Demands aligning dead-level with end-bearing plates to avoid shaft binding
According to DASMA Technical Data Sheet on garage door spring cycle life, increasing the spring wire gauge and coil diameter slightly yields a massive jump from standard 10,000-cycle life to over 25,000 cycles with zero loss of counterbalance force.
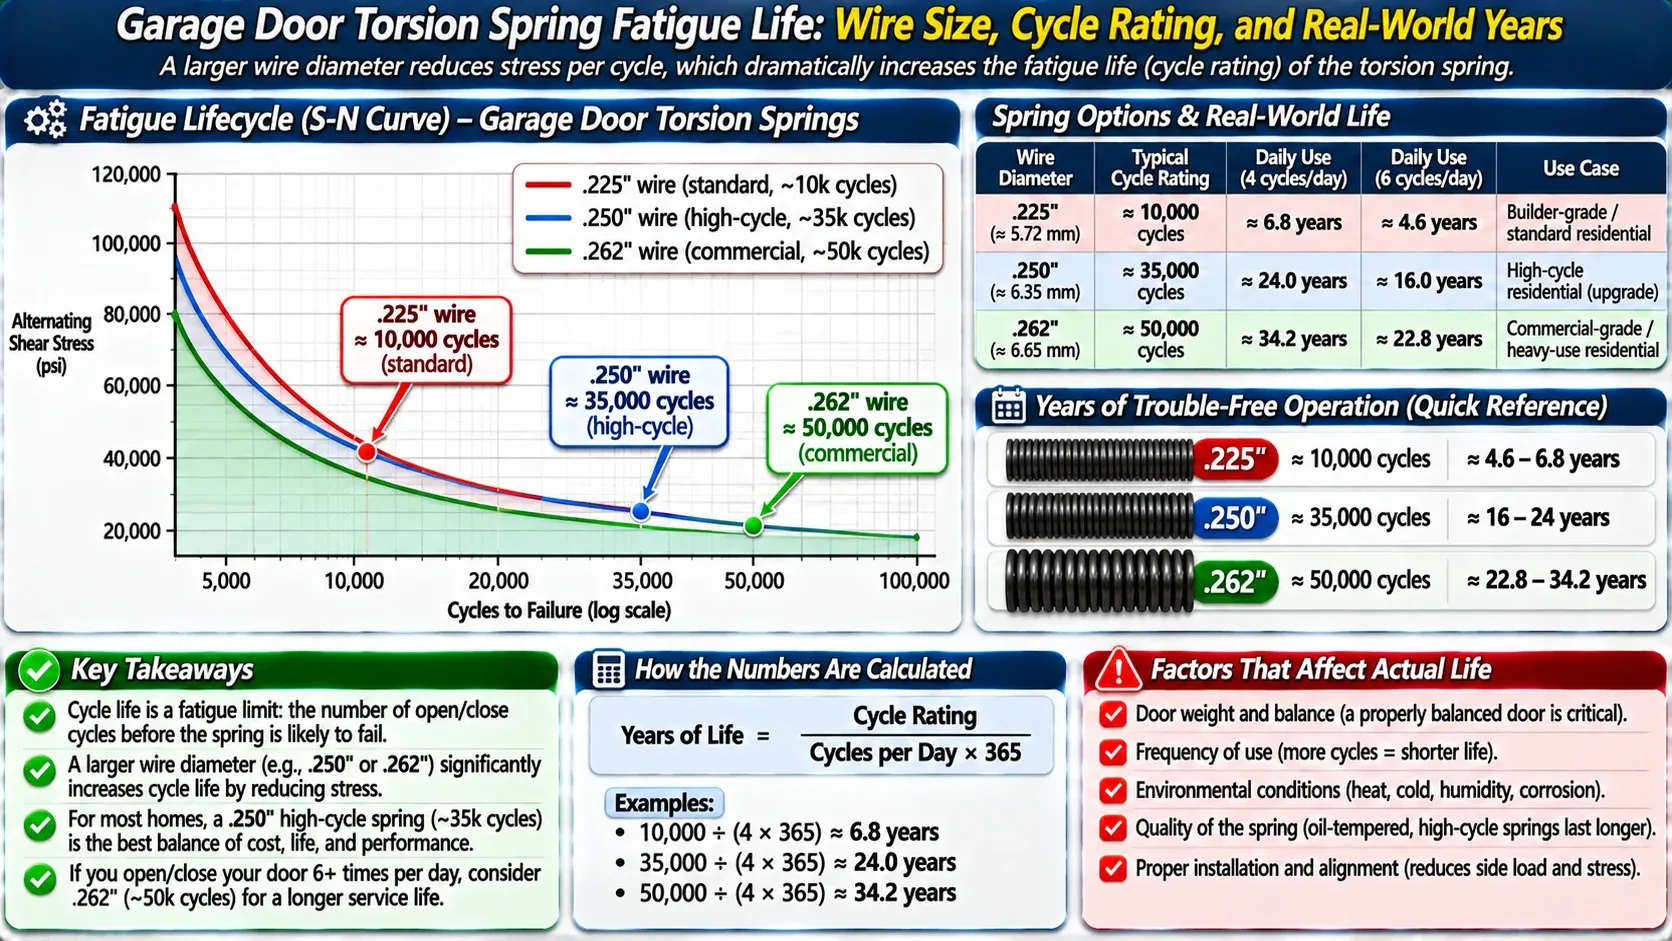
Engineering fatigue lifecycle curve infographic for garage door torsion springs, graph plotting wire diameter (.
Garage door springs carry an engineering rating known as cycle life. One cycle equals one complete opening and one complete closing of the door.
A standard builder-grade spring delivers 10,000 cycles. A typical family cycling their door four times per day consumes roughly 1,460 cycles annually. That spring will reach its mechanical fatigue limit in six to seven years.
To achieve 30,000 cycles, spring manufacturers do not invent magic steel. They adjust three physical parameters: wire diameter, inner spring diameter, and overall coil length.
By stepping up to a thicker wire diameter (such as moving from .225 to .250-inch wire) and lengthening the spring body from twenty-four inches up to thirty-six inches, each individual coil twists through a much smaller elastic angle during each door movement.
This reduced torsional strain triples the fatigue life of the steel from seven years to over twenty-five years. A pair of 30,000-cycle high-cycle springs costs only $30 to $40 more than disposable 10,000-cycle units.
Safety First: The Non-Negotiable Rules of Torsion Springs
A wound garage door torsion spring stores enough potential mechanical energy to shatter bone or cause fatal injuries. If you possess mechanical discipline and the proper tools, you can replace springs safely. If you feel hesitant, purchase quality high-cycle springs online and hire a local technician to handle installation.
- Never Use Improvised Winding Tools: Screwdrivers, punches, or pipe wrenches will slip and whip through the air at lethal speed. Use dedicated 1/2-inch cold-rolled steel bars only.
- Stand Outside the Flight Path: Always stand at a 45° angle on a stable stepladder. Never align your face, chest, or head directly in front of the winding cone.
- Verify Full Engagement: Fully seat the lower winding bar into the cone socket before loosening set screws or releasing the upper bar. One bar must hold the load at all times.
Essential Tooling: Dedicated 1/2-Inch Winding Bars
Never touch a winding cone without a matching pair of 1/2-inch diameter, 18-inch long cold-rolled solid steel winding bars.
Winding cones feature cast-in sockets sized specifically for 1/2-inch round stock. Using a 3/8-inch punch or a screwdriver allows the tool to wobble inside the socket. The moment you release set screws under high torque, that loose screwdriver will slip, whipping the handle downward with enough force to fracture your forearm or jaw.
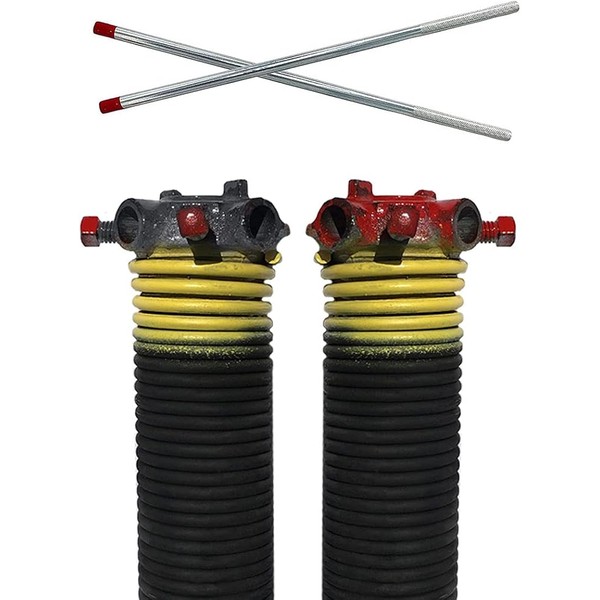
DURA-LIFT 0.250-Inch x 2-Inch x 32-Inch Dual Torsion Spring Kit
Best For: Converting single-spring double doors to a permanent, lifetime dual-spring configuration.
- +High-cycle oil-tempered steel wire delivers up to 30,000 reliable door cycles
- +Pre-assembled with heavy-duty cast aluminum stationary and winding cones
- +Clearly color-coded winding lines and cones prevent left/right installation errors
- +Engineered to convert standard 16-foot builder doors to balanced dual operation
- -Requires precise measurement of existing door weight and track height before ordering
- -Heavier coil mass requires careful handling during center-bracket assembly
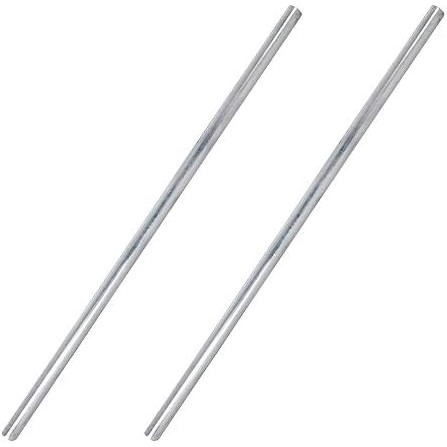
Prime-Line GD 52238 1/2-Inch x 18-Inch Steel Winding Bars (Pair)
Best For: The mandatory safety tool required to wind or unwind garage door torsion springs.
- +Machined from solid cold-rolled steel to eliminate bending or flexing under tension
- +Exact 1/2-inch outer diameter seats deeply into standard torsion winding cones
- +Generous 18-inch length provides safe, controllable leverage during winding
- +Knurled non-slip handles provide positive grip for greasy or gloved hands
- -Strictly a manual specialty tool with no alternate workshop uses
- -Heavy steel requires safe storage away from curious children
Measuring Your Door for Dual Spring Conversion
To order the exact replacement springs for your door, gather three critical measurements:
- Weigh the Door: Disconnect your automatic opener. Place a mechanical analog bathroom scale flat on the concrete slab directly beneath the center of the bottom door panel. Carefully disengage the manual lock and lower the full weight of the door onto the scale. Note the total deadweight (e.g., 175 lbs).
- Measure Door Height: Confirm your vertical opening height (standard residential doors measure exactly 7 feet or 8 feet).
- Inspect the Cable Drums: Verify the drum casting number located on the outer edge of your aluminum cable spools (standard residential drums are marked 400-8).
Supply these three figures to an authorized spring supplier to receive a matched pair of left-wound and right-wound high-cycle springs calibrated precisely to your door’s balance point.
Step-by-Step Conversion and the 3-Foot Balance Test
The 5-Step Dual-Spring Conversion Sequence
Standard protocol for unwinding old tension, mounting dual cones, and winding balanced coils.
Mechanical Track Lock Down
3 minsClamp two pairs of locking pliers (Vise-Grips) tightly to the vertical tracks directly above the third roller to prevent the door from jumping.
Controlled Spring Unwinding
10 minsInsert two 1/2-inch winding bars into the cone, back out square set screws, and carefully unwind remaining tension quarter-turn by quarter-turn.
Mount Dual High-Cycle Springs
12 minsLoosen center bearing plate, slide broken assembly off torsion tube, and mount color-coded springs (red cone on left, black cone on right).
Precision Turn Counting & Winding
15 minsDraw a straight chalk line down spring coils. Wind 30 to 32 quarter-turns for a 7-foot door, using chalk line to verify full rotations.
Bite Torque on Set Screws
5 minsTighten square-head set screws until they contact steel tube, then add 1/2 to 3/4 turn to dimple the pipe and lock position permanently.
Door lifts effortlessly with two fingers and stops dead at the 3-foot mark without rising or dropping.
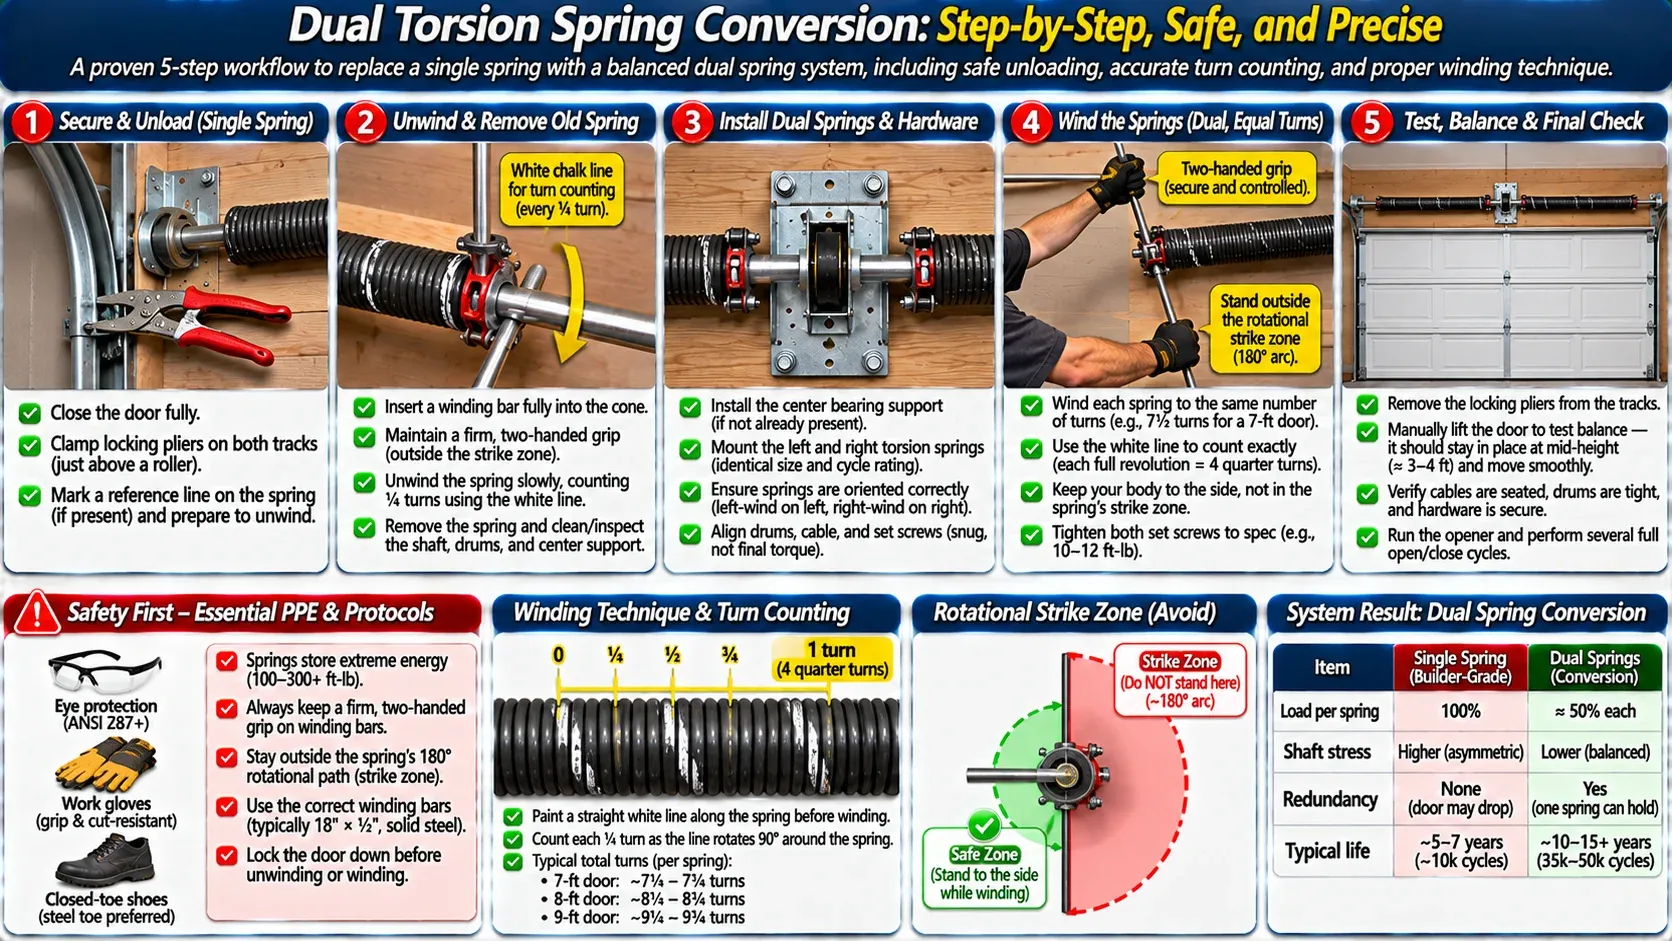
Technical five-step sequence and safety protocol diagram for dual torsion spring conversion, showing proper winding bar dual-handed grip technique outside rotational strike zone, white chalk line painted down spring unwinding to count exact quarter turns, safety lock pliers on track, CAD visual.
The 3-Foot Balance Test
After tightening all set screws, remove your locking pliers from the tracks. Disengage the electric trolley opener and test the mechanical balance of your door by hand:
Lift the door manually until it rests roughly three feet off the floor (waist level), then let go.
- A perfectly balanced door: Floats stationary in mid-air without creeping upward or sliding back down.
- If the door drops toward the floor: The springs require one additional quarter-turn of tension.
- If the door pulls violently upward: The springs are over-wound; back off one quarter-turn immediately.
If your garage door opener is noisy or clunky, consider replacing it with an ultra-quiet belt-drive unit as detailed in our guide on chain versus belt versus wall-mount openers. To prevent coil rust and eliminate squeaks between metal coils, follow our maintenance instructions in stop spraying WD-40 on your garage door.
Eliminate the builder-grade single spring from your overhead track. Upgrade to a matched pair of 30,000-cycle high-cycle springs, and your door will operate effortlessly, safely, and quietly for the next quarter-century.
Hank Miller
Hank is a master craftsman and DIY mechanic based in Ohio. He tests workshop equipment, garage floor coatings, and power tools under brutal, real-world workshop conditions, with zero paid brand sponsorships.