How to Fix Cracks in a Concrete Garage Floor Before Epoxy (The Chasing & Polyurea Method)

Standard latex caulk and hydraulic cement crack under 4,000-pound tire loads. Learn how diamond blade chasing and two-part polyurea weld cracks permanently.
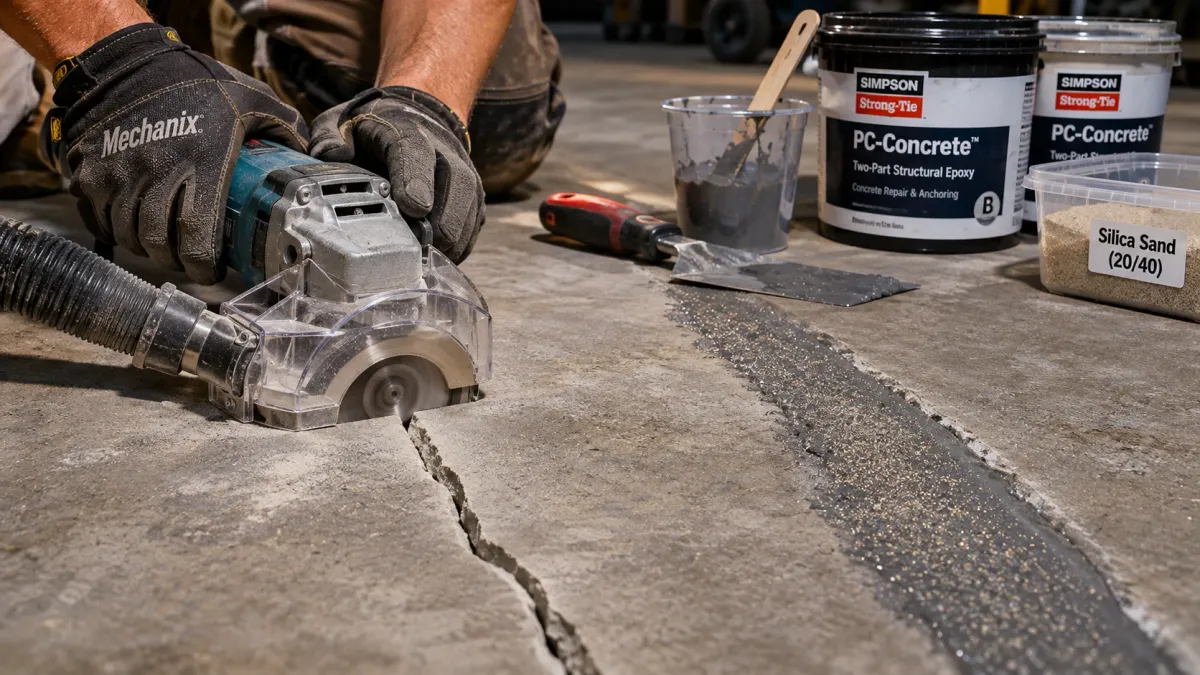
Table of Contents5 Sections
You spend two full weekends cleaning, acid-etching, and rolling out a glossy two-part epoxy floor coating in your garage. Four months later, after the first freezing stretch of winter, you pull your truck inside, look down at the floor, and see an ugly jagged fracture running straight through your brand-new coating directly over an old hairline crack.
This failure is known in the flooring industry as crack telegraphing. Homeowners assume the paint coating failed, but the real culprit is what they stuffed inside the crack before rolling out the resin: cheap hardware-store squeeze-tube caulk or fast-setting hydraulic cement paste.
I spent decades repairing heavy industrial slabs and machine foundations across the Midwest. In this guide, I break down why flexible caulks destroy epoxy coatings, explain the critical mechanical process of diamond-blade crack chasing, and show you how to weld cracks permanently using low-viscosity, rapid-cure two-part polyurea chemistry.
Hank's Bottom Line on Concrete Crack Repair
- Never use flexible acrylic or silicone caulk under epoxy; tire weight compresses the rubber caulk and causes "crack telegraphing".
- Opening hairline cracks with a 4.5-inch diamond V-groove blade to 1/4-inch width and depth is mandatory for mechanical adhesion.
- Low-viscosity two-part polyurea penetrates deep into capillaries, cures harder than concrete in 15 minutes, and grinds perfectly flush.
- Broadcast dry silica sand into fresh epoxy gel to create mechanical tooth for the topcoat resin.
The Fatal Flaw of Big-Box Store Crack Caulks
The International Concrete Repair Institute (ICRI) technical guidelines for concrete crack repair require rigid structural repair mortars or deep-penetrating low-viscosity polyureas rather than flexible acrylic latex caulks that compress and debond under floor grinders.
Walk down the masonry aisle at any home improvement center, and you will find shelves lined with squeeze tubes labeled concrete repair caulk or flexible acrylic sealant for ten dollars. Big-box tutorials frequently advise homeowners to squeeze this paste directly into slab fractures, smooth the surface with a putty knife, and roll epoxy directly over the top.
That advice creates an inevitable floor failure under vehicle traffic. Epoxy and polyaspartic coatings form a rigid, glass-like thermoset plastic shell that requires a completely unyielding substrate underneath.
Flexible acrylic and silicone caulks remain soft, spongy, and elastic after curing. When a four-thousand-pound vehicle tire rolls across that repair, the soft rubber caulk beneath the coating compresses under the immense localized load.
Because the underlying caulk flexes while the brittle epoxy shell cannot bend, the coating shears at both edges of the crack, flaking off in jagged ribbons. Hydraulic cement pastes present the opposite problem: while rigid, cement has zero tensile bond strength against old, dirty crack walls, causing the patch to shatter into loose sand after seasonal freeze-thaw cycles.
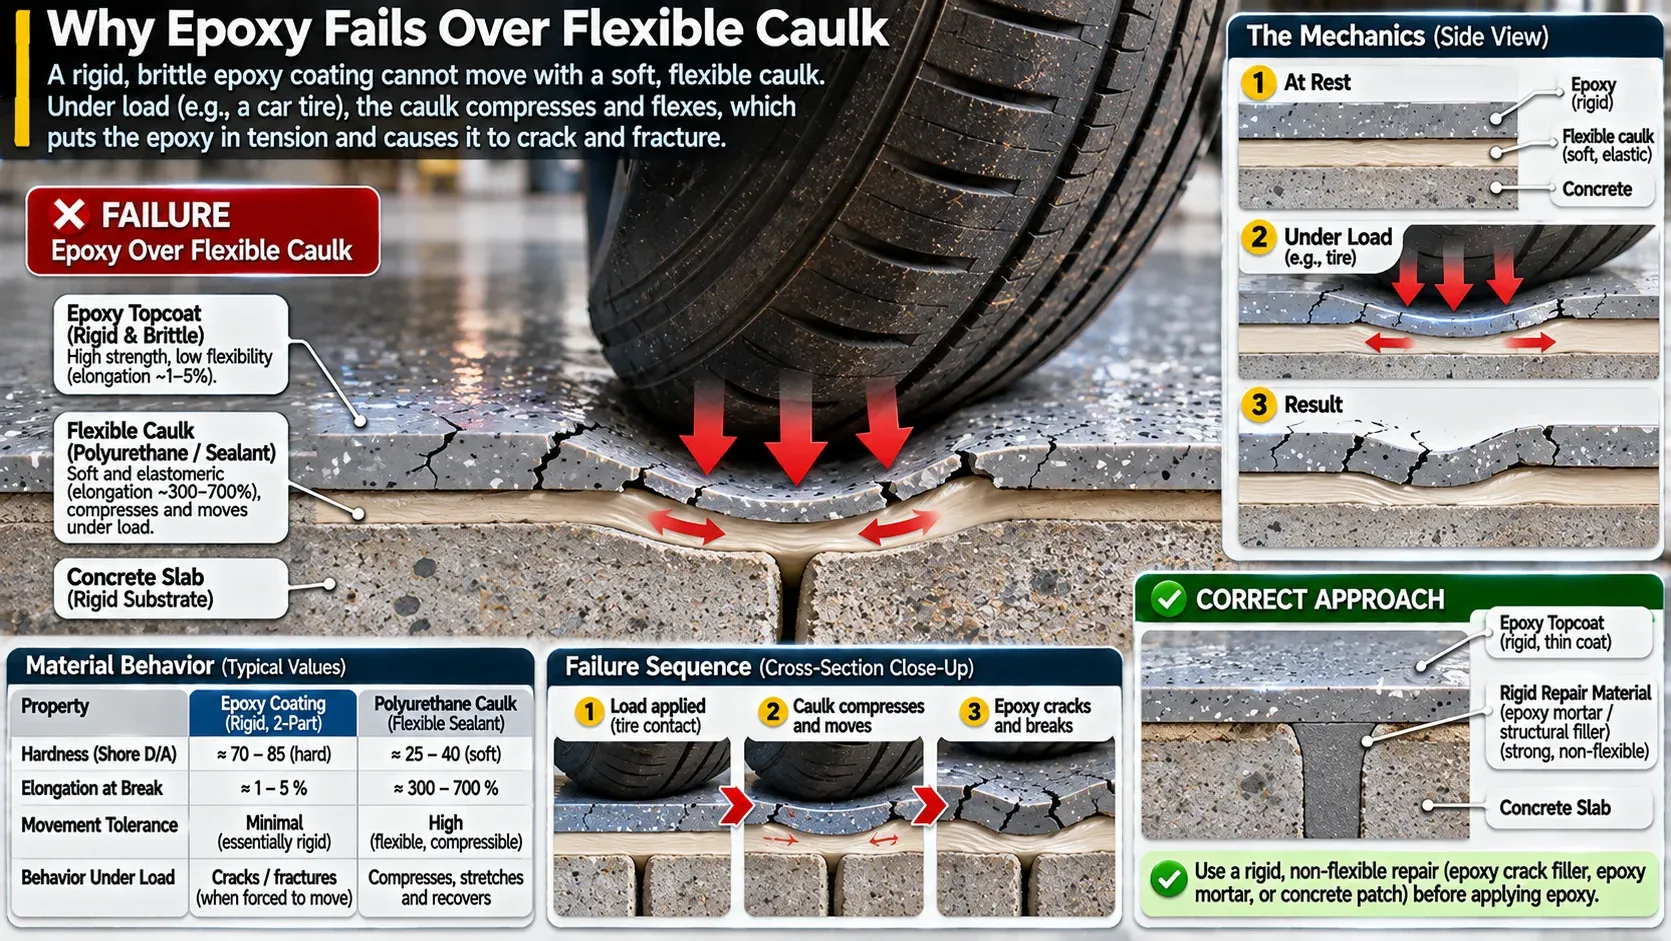
Technical cross section diagram illustrating epoxy failure over flexible caulk, showing car tire compressing soft flexible polyurethane caulk causing brittle rigid epoxy topcoat to crack and fracture along seam, red failure arrows, labeled engineering materials.
Concrete Fracture Diagnostic: Dormant Hairlines vs. Active Movement Faults
Identify your slab fracture type to apply the correct chemical repair strategy.
Hairline fracture under 1/8 inch wide; both slab sides sit at the exact same elevation
One slab section sits 1/4 inch higher than the adjacent slab section
Straight, saw-cut channels scored across the floor every ten to twelve feet
Step 1: Chasing the Crack with a Diamond V-Groove Blade
Applying any repair material over an unprepared, raw concrete crack guarantees failure. The interior faces of a natural fracture are packed with loose aggregate dust, oil residues, and crumbling micro-fractures that prevent adhesive penetration.
You must perform a trade process known as crack chasing. Mount a specialized 4.5-inch diamond V-groove blade onto an angle grinder equipped with a dust-shroud attachment connected directly to your HEPA shop vacuum.
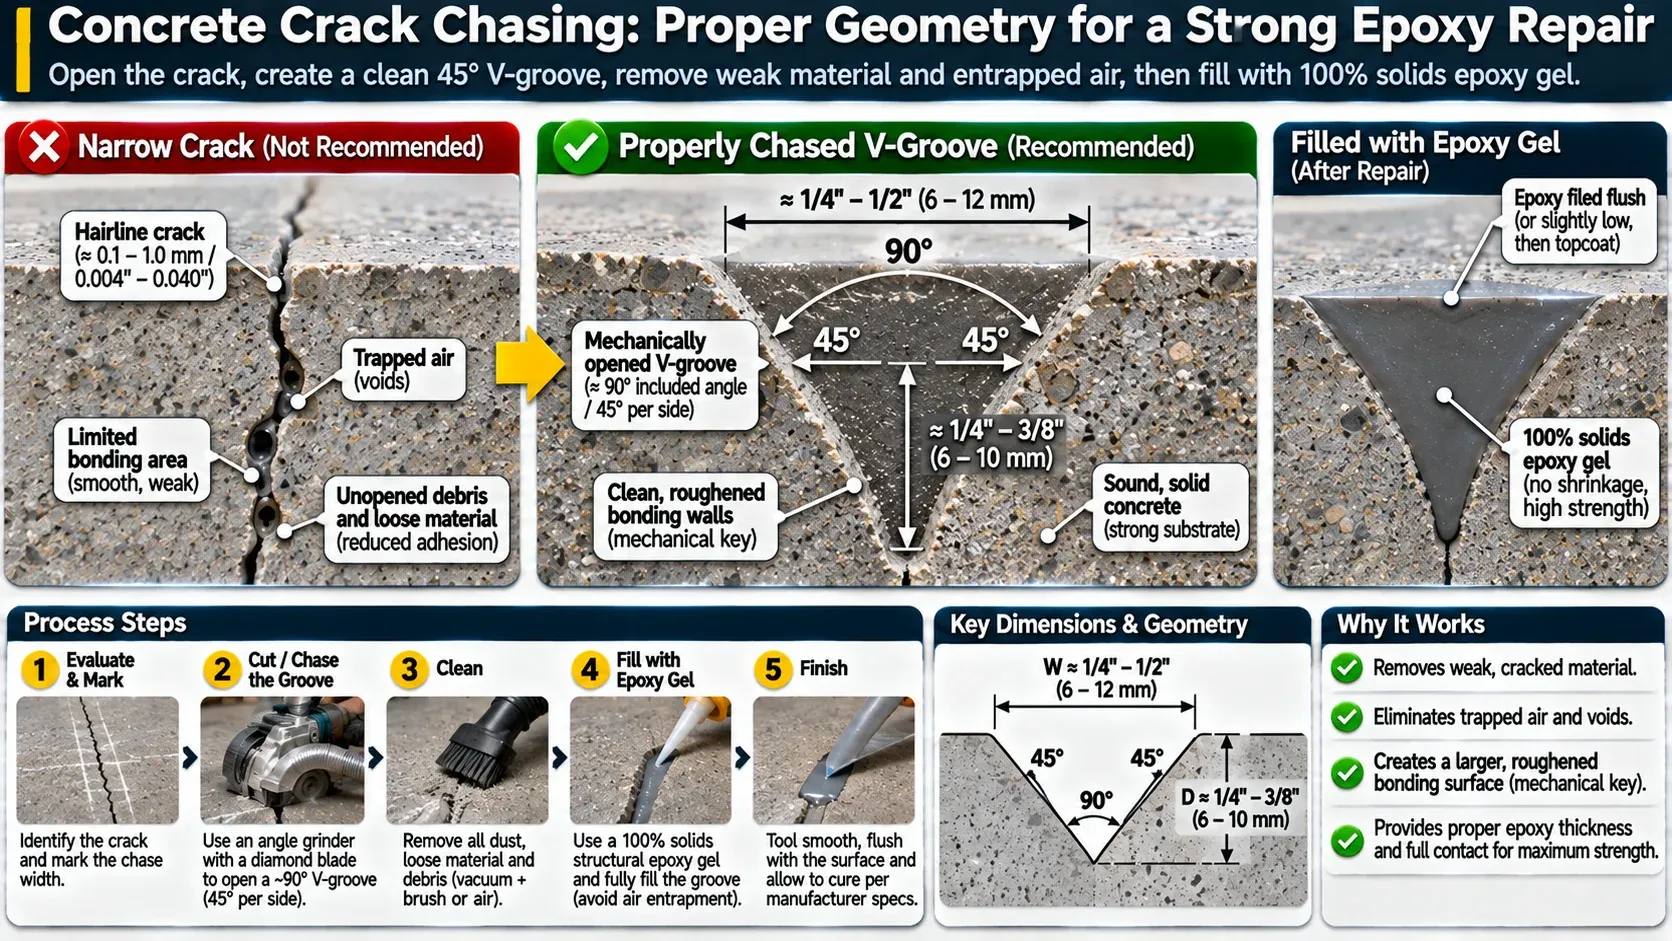
Detailed CAD profile diagram of concrete crack chasing geometry, comparing narrow hairline crack with trapped air pockets vs mechanically opened 45-degree V-groove profile with clean roughened bonding walls ready for 100% solids epoxy gel, clear dimension callouts.
Run the spinning diamond wheel along the entire length of the fracture, opening the crack into a clean, uniform V-shaped trench measuring roughly one-quarter inch wide and one-half inch deep. This process removes crumbling aggregate, creates fresh mechanical bonding surfaces, and opens narrow capillaries so the liquid repair resin can gravity-feed deep into the bottom of the slab.
After grinding, run a stiff wire hand brush through the channel to dislodge clinging grit, then vacuum the trench thoroughly with your shop vac crevice tool. The channel must be completely bone-dry and dust-free before injecting chemical resins.
Step 2: Choosing Your Weapon: Polyurea vs. 100% Solids Epoxy Gel
Professional floor coating contractors rarely use standard epoxy paste for horizontal floor crack repairs. Instead, they rely on two-part rapid-curing polyurea chemistry.
Polyurea features an ultra-low viscosity that feels almost like water when mixed. That low surface tension allows the resin to penetrate deep into hairline fractures and microscopic capillary pores before curing, welding the two opposing concrete slabs together from the bottom up.
Polyurea also cures to full compressive strength in twenty to thirty minutes, even in cold garage temperatures down to thirty degrees Fahrenheit. You can mix, pour, cure, and grind a polyurea crack repair in a single morning, allowing you to roll your epoxy basecoat that same afternoon.
Two-part 100 percent solids epoxy gels work well on wide structural voids or vertical wall cracks where runnier polyurea liquids would drain out. However, epoxy gels require eight to twelve hours to achieve full hardness before they can be ground flat.
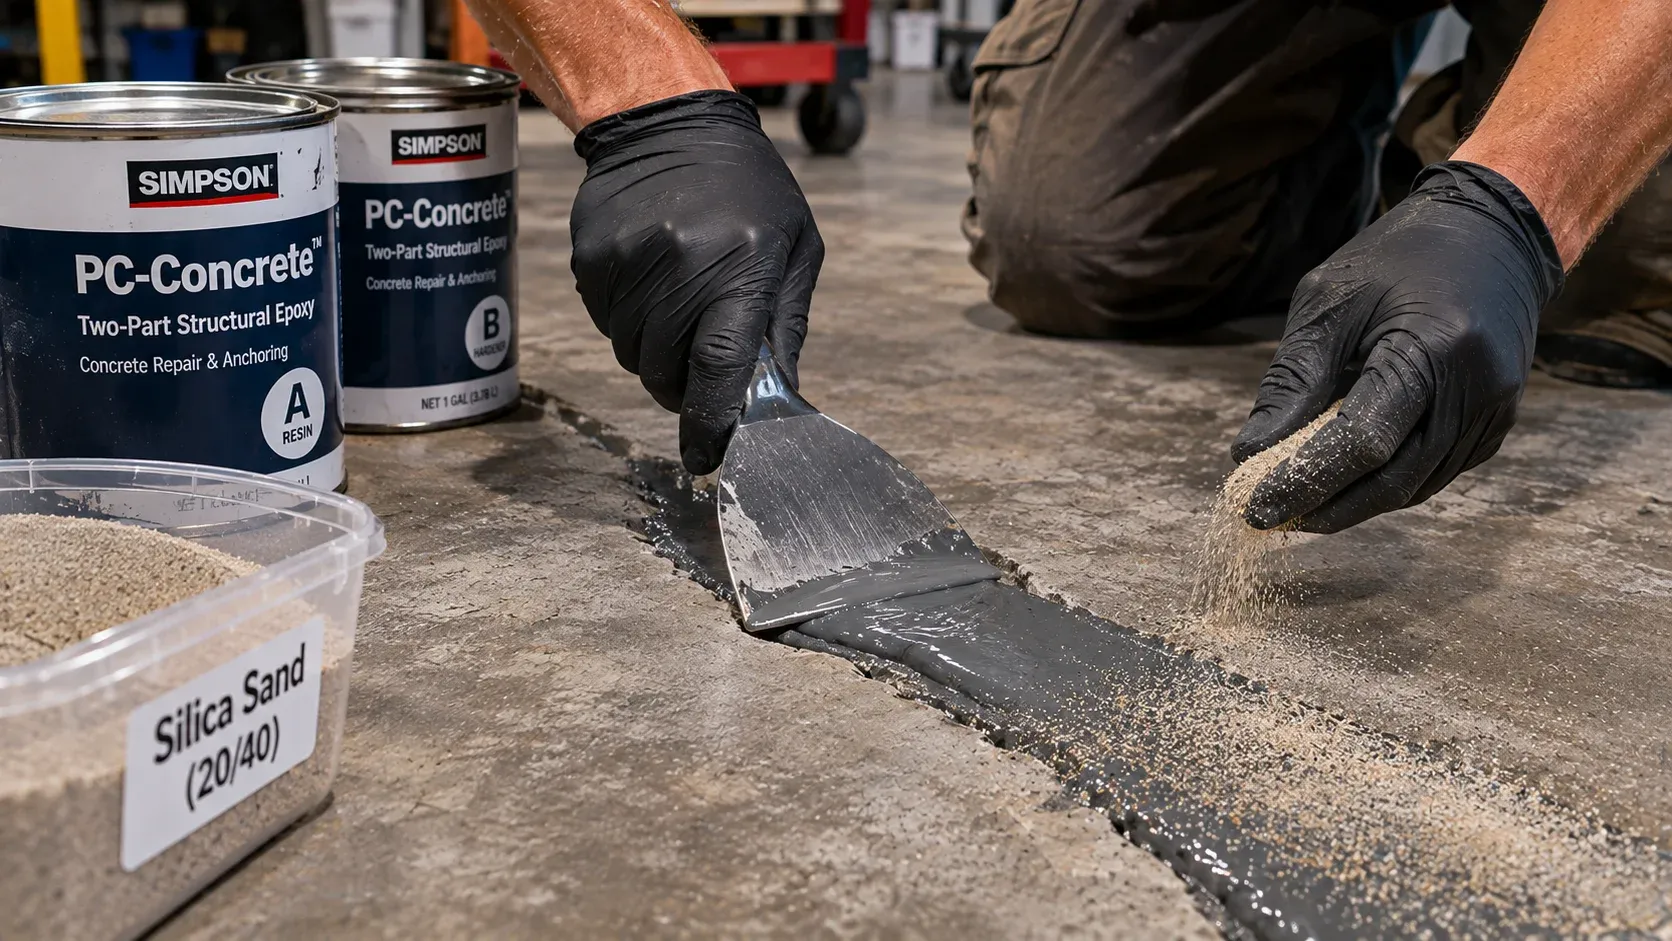
Hands of a DIYer using a wide steel putty knife pressing dark gray structural two-part epoxy gel flush into a chased floor crack, lightly broadcasting dry silica sand onto the tacky wet repair patch to create mechanical tooth for future coatings, crisp workshop photography.
Concrete Crack Filler Comparison: Retail Caulks vs. Industrial Resins
Comparing compression resistance, curing speed, and long-term epoxy compatibility.
Hardware Store Tube Caulk (Silicone/Latex)
Exterior patio gaps not receiving rigid epoxy paint
- Easy squeeze-gun application with zero mixing
- Compresses under tire pressure and telegraphs fractures through epoxy
Hydraulic Cement Mortar Paste
Plugging active water leaks in vertical basement walls
- Forms a rigid cementitious surface
- Lacks flexural bond strength and shatters into loose powder within months
Two-Part Rapid-Cure Polyurea (Recommended)
All interior garage floor fractures prior to epoxy or polyaspartic coats
- Cures in 20 minutes and grinds perfectly flush with diamond tooling
- Fast 2-minute pot life requires working in small batches
Step 3: Overfilling and Flush-Grinding
When you pour two-part polyurea into a chased channel, do not attempt to trowel it flush with the slab surface while wet. Capillary action draws liquid resin down into the deep interior pores of the concrete, causing the liquid level to sink slightly as it cures.
Pour the mixed polyurea until the fluid crowns slightly above the surrounding concrete surface (roughly one millimeter higher than the floor plane). Allow the material to cure solid for twenty to thirty minutes until it transforms into a rock-hard composite.
Once fully hardened, mount a diamond cup grinding wheel on your angle grinder. Grind the hardened polyurea crown down until the repair sits perfectly flat and flush with the surrounding concrete floor.
Run your bare hand across the ground seam; you should feel zero lip, ridge, or dip between the concrete slab and the repair material. When you roll your epoxy primer or basecoat across this flush repair, the coating bonds to a rigid, monolithic substrate that will never crack, lift, or telegraph under heavy tire traffic.
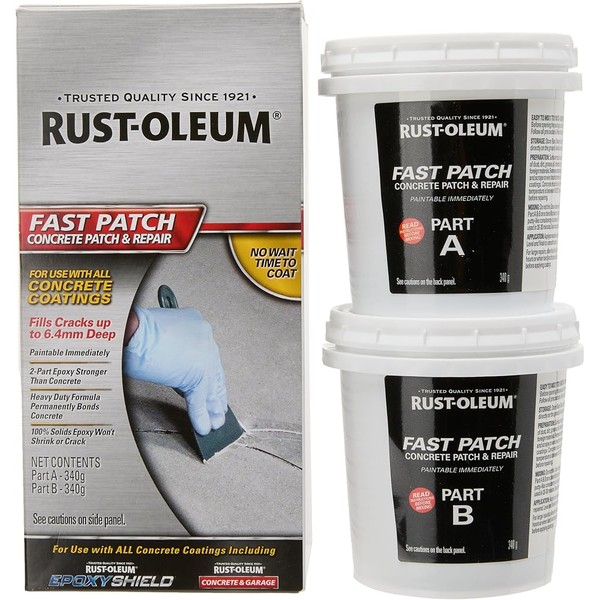
Rust-Oleum Concrete Patch and Repair Kit (Two-Part Epoxy)
Best For: Filling wider divots, chips, and localized cracks
Est. Price: $24 - $30
"A dependable, widely available two-part epoxy patch kit for repairing surface spalls and wider structural fractures."
- +Pre-measured two-part formula mixes easily without complex ratios
- +Forms a high-strength rigid composite that will not shrink or compress
- +Compatible with all DIY and commercial epoxy and polyaspartic coatings
- -Higher viscosity requires pressing into narrow hairlines with a putty knife
- -Requires eight hours of full cure time before aggressive power grinding
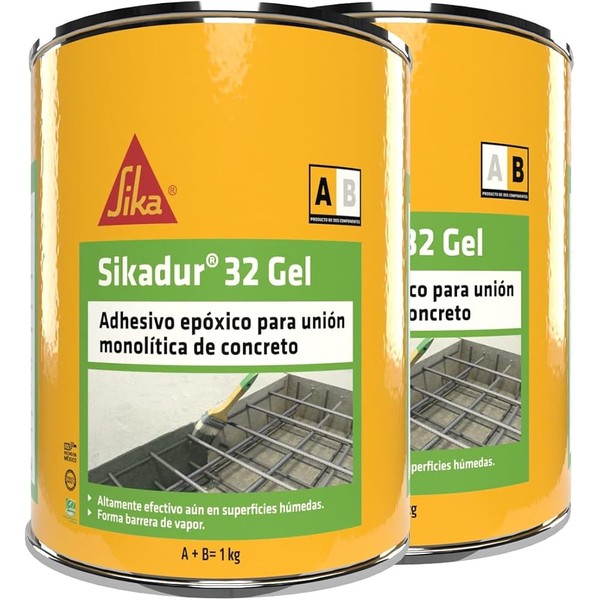
Sikadur 32 Hi-Mod High-Strength Epoxy Bonding Gel
Best For: Anchoring heavy structural cracks and floor stitching
Est. Price: $42 - $52
"The definitive structural adhesive gel used by civil engineers to lock cracked concrete slabs together permanently."
- +Structural compressive strength exceeds 8,000 PSI after full cure
- +Moisture-tolerant formula bonds tenaciously to damp or cold concrete
- +Ideal for locking steel rebar dowels across shifting slab joints
- -Thick paste consistency requires mechanical dispensing or troweling
- -Premium investment compared to basic hardware store patching mixes
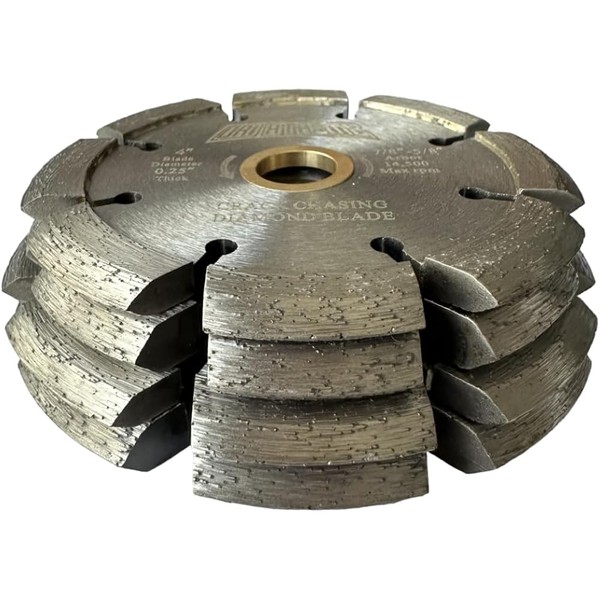
4.5-Inch Diamond V-Groove Crack Chasing Blade & Shroud Kit
Best For: Opening and cleaning crack channels prior to filling
Est. Price: $38 - $48
"The essential preparation tool that turns jagged, dirty concrete fractures into clean, anchor-ready repair trenches."
- +V-shaped diamond segment profile creates ideal mechanical bonding channel
- +Dust shroud captures 95 percent of hazardous airborne silica dust
- +Fits all standard 4.5-inch and 5-inch handheld angle grinders
- -Requires high-airflow HEPA vacuum to maintain full dust extraction
- -Diamond matrix cuts fast; requires steady two-handed tool control
Completing Your Garage Slab Restoration
Once your concrete cracks are chased, filled, and ground flat, you can address the remaining surface preparation steps to ensure a flawless final coating.
If your floor also sheds fine white dust whenever you sweep, treat the unpainted concrete with a penetrating chemical densifier as detailed in our guide on why your garage concrete never stops dusting.
If you plan to apply an epoxy or polyaspartic coating over your repaired slab, protect your investment against hot-weather tire failures by reading our technical breakdown on why cheap garage epoxy peels under hot tires and our comparison of polyaspartic vs. epoxy clear topcoats. If stubborn motor fluids have penetrated near the cracks, pull them out first using our guide on how to pull deep oil stains out of concrete.
Hank Miller
Hank is a master craftsman and DIY mechanic based in Ohio. He tests workshop equipment, garage floor coatings, and power tools under brutal, real-world workshop conditions, with zero paid brand sponsorships.