Plywood vs. Drywall for Garage Workshop Walls: What Code Actually Allows (And the Sandwich Solution)

Drywall crumbles under shop impacts, but ripping it down violates IRC fire code. Learn how the drywall-plywood sandwich gives you bulletproof hanging power legally.
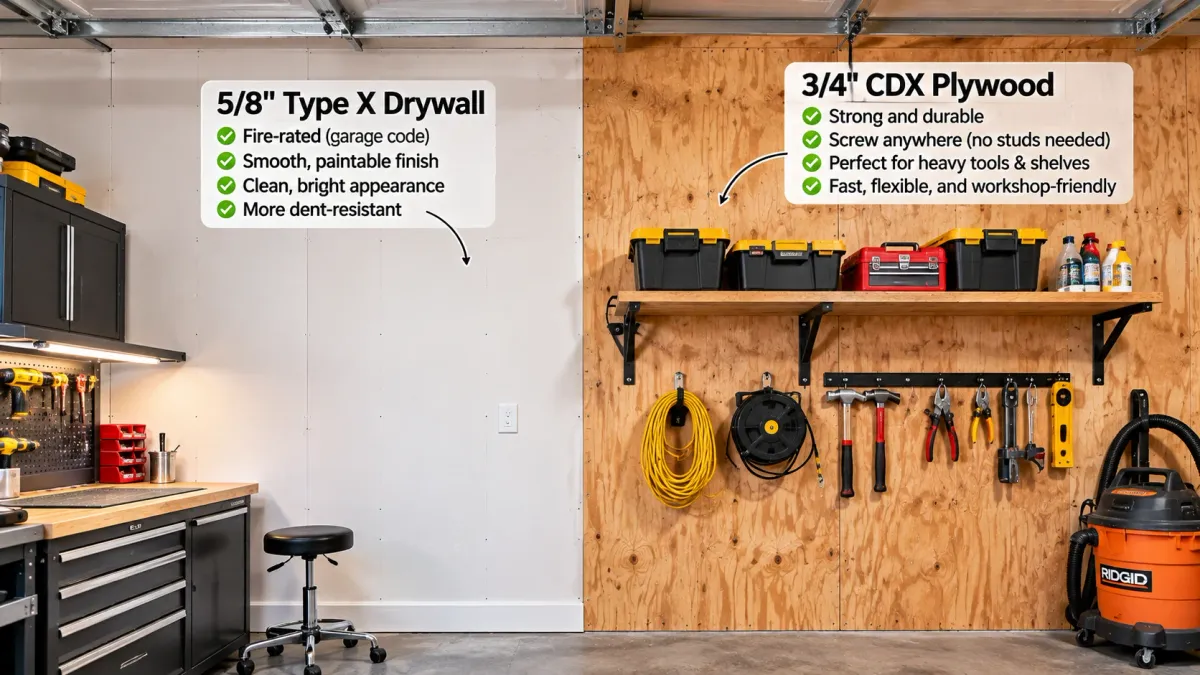
Table of Contents6 Sections
- 01.The Heavy-Duty Dream: Why Plywood Crushes Drywall for Workshops
- 02.The Fire Code Reality Check: IRC Section R302.6
- 03.The “Sandwich Solution”: The Best of Both Worlds
- 04.Plywood vs. OSB: Which Sheet Good Should You Buy?
- 05.The Bright Workshop Finish: Priming and Painting
- 06.Outfitting Your New Solid Workshop Walls
You attempt to hang a heavy garden hose reel or a steel cord hanger on your garage wall using a plastic drywall anchor. Two days later, you pull the hose forward, and the anchor tears out of the wall, leaving a lemon-sized crater of pulverized gypsum crumbling onto your workbench while your expensive equipment crashes to the floor.
Standard half-inch drywall is an aggravating wall material for an active workshop. It punctures when a ladder slips, softens when exposed to seasonal garage humidity, and requires you to locate stud centers with a magnetic sensor every single time you want to drive a screw.
Many DIY woodworkers tear out their builder-grade drywall and screw sheets of plywood across the studs. That impulse seems logical until a municipal building inspector red-tags the home during a property sale or an insurance adjuster denies a garage fire claim because the homeowner illegally tore down a fire-separation barrier.
I framed commercial bays and converted residential garages into heavy fabrication spaces across Ohio. In this guide, I decode International Residential Code fire-separation rules, compare plywood and OSB for real workshop abuse, and show you how to execute the drywall-plywood sandwich method that gives you solid hanging power without violating building codes.
The Heavy-Duty Dream: Why Plywood Crushes Drywall for Workshops
In an active woodworking or automotive bay, walls take constant physical punishment. Sheetrock lacks structural impact resistance: bumped lawnmower handles crush through the paper face, leaning lumber gouges deep tracks, and heavy vibrations from air compressors shake hollow drywall anchors loose.
Three-quarter-inch ACX or sanded pine plywood transforms your garage perimeter into a structural utility surface. Plywood delivers immense screw-holding shear strength across every square inch of its face.
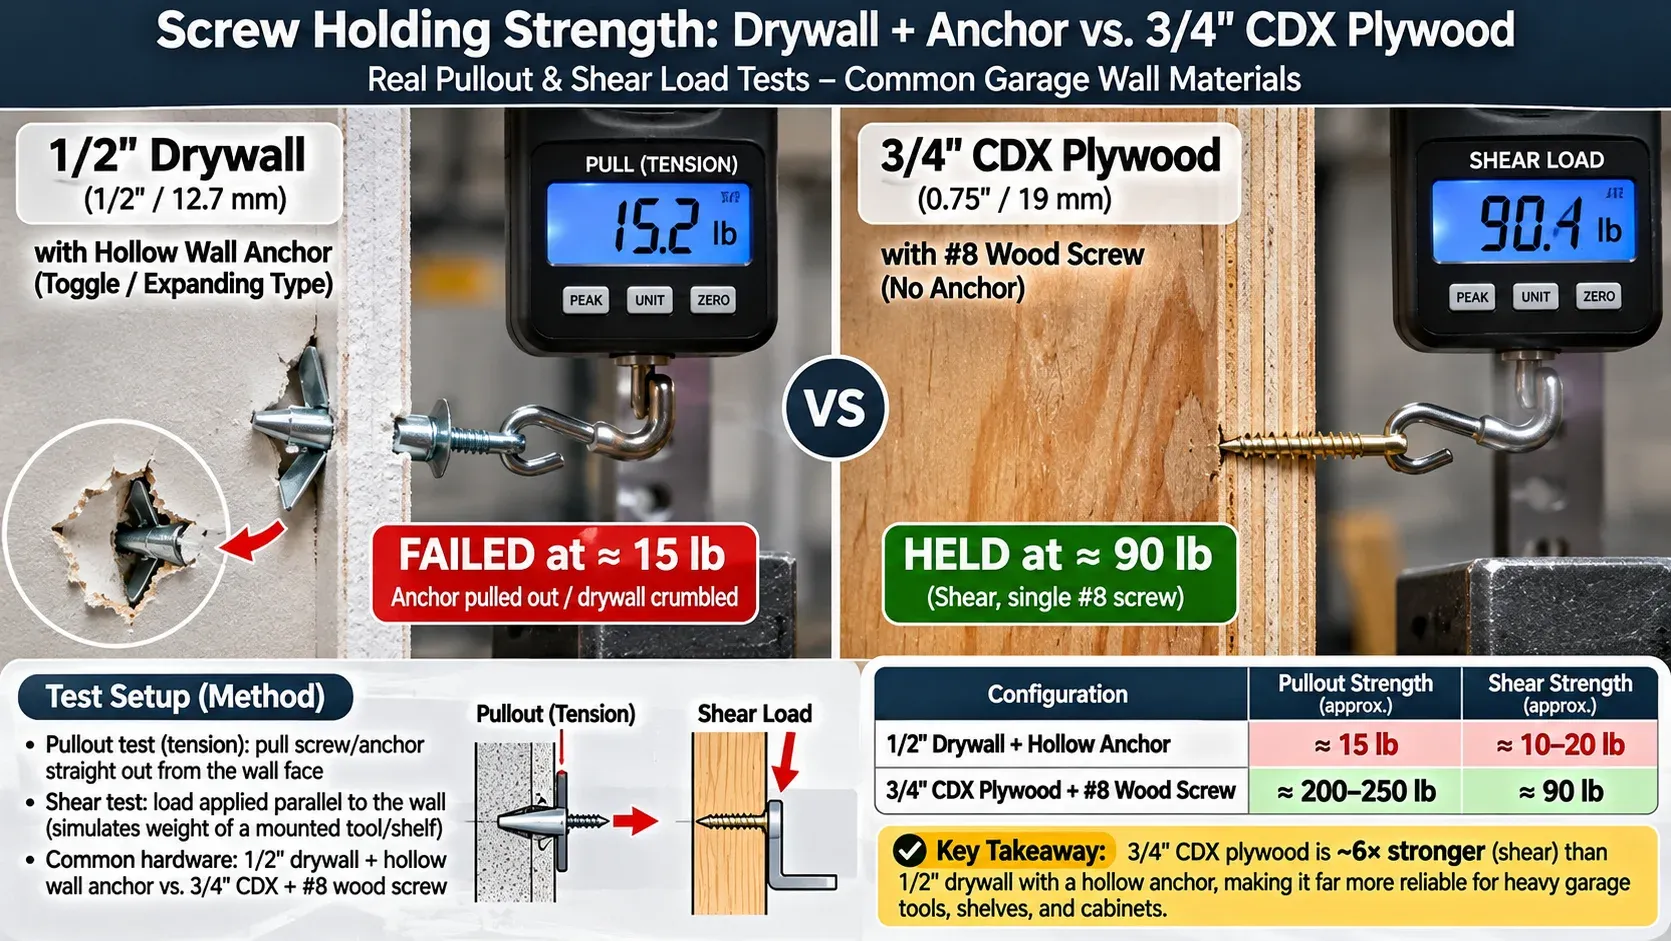
Technical mechanical comparison infographic showing screw pullout and shear strength, comparing 1/2 drywall with hollow wall anchor failing at 15 lbs vs 3/4-inch CDX plywood holding 90 lbs shear load per single wood screw without anchor, clear engineering tensile testing visuals.
You can drive a standard 1.5-inch wood screw directly into the center of a plywood panel between two framing studs, and the wood fibers will support a fifty-pound tool caddy, air manifold, or cord reel without an anchor. You gain complete freedom to mount tool holders, battery charging stations, and shelves wherever you need them, without being locked into sixteen-inch stud layouts.
The Fire Code Reality Check: IRC Section R302.6
Under the International Residential Code (IRC Section R302 on garage fire separation), attached garages require minimum 1/2-inch gypsum drywall on interior walls shared with living spaces, with 5/8-inch Type X on ceilings below habitable rooms.
Before grabbing a demolition pry bar and ripping down your garage drywall, you must understand the legal fire-protection requirements governing attached garages.
Under Section R302.6 of the International Residential Code (IRC), any garage physically attached to a residential living space must incorporate a fire-separation barrier. This structural barrier protects sleeping occupants by retarding the spread of toxic smoke and flames originating from fuel tanks, lithium batteries, or welding sparks for at least thirty to sixty minutes.
The building code establishes strict mandates:
- Shared Party Wall: The common wall separating the garage from the home interior must feature a continuous layer of fire-resistant gypsum drywall measuring at least 1/2-inch thick.
- Overhead Ceilings: If a residential bedroom or second-floor living space sits directly above the garage ceiling, the ceiling must be sheeted with fire-rated 5/8-inch Type X gypsum board with taped and mudded seams.
Plywood and Oriented Strand Board (OSB) are combustible Class C building materials that do not satisfy fire-separation requirements. If you strip down the drywall on that shared house wall and replace it with bare plywood, you violate life-safety codes, fail prospective home sale inspections, and risk complete denial of insurance coverage if a garage fire damages the home.
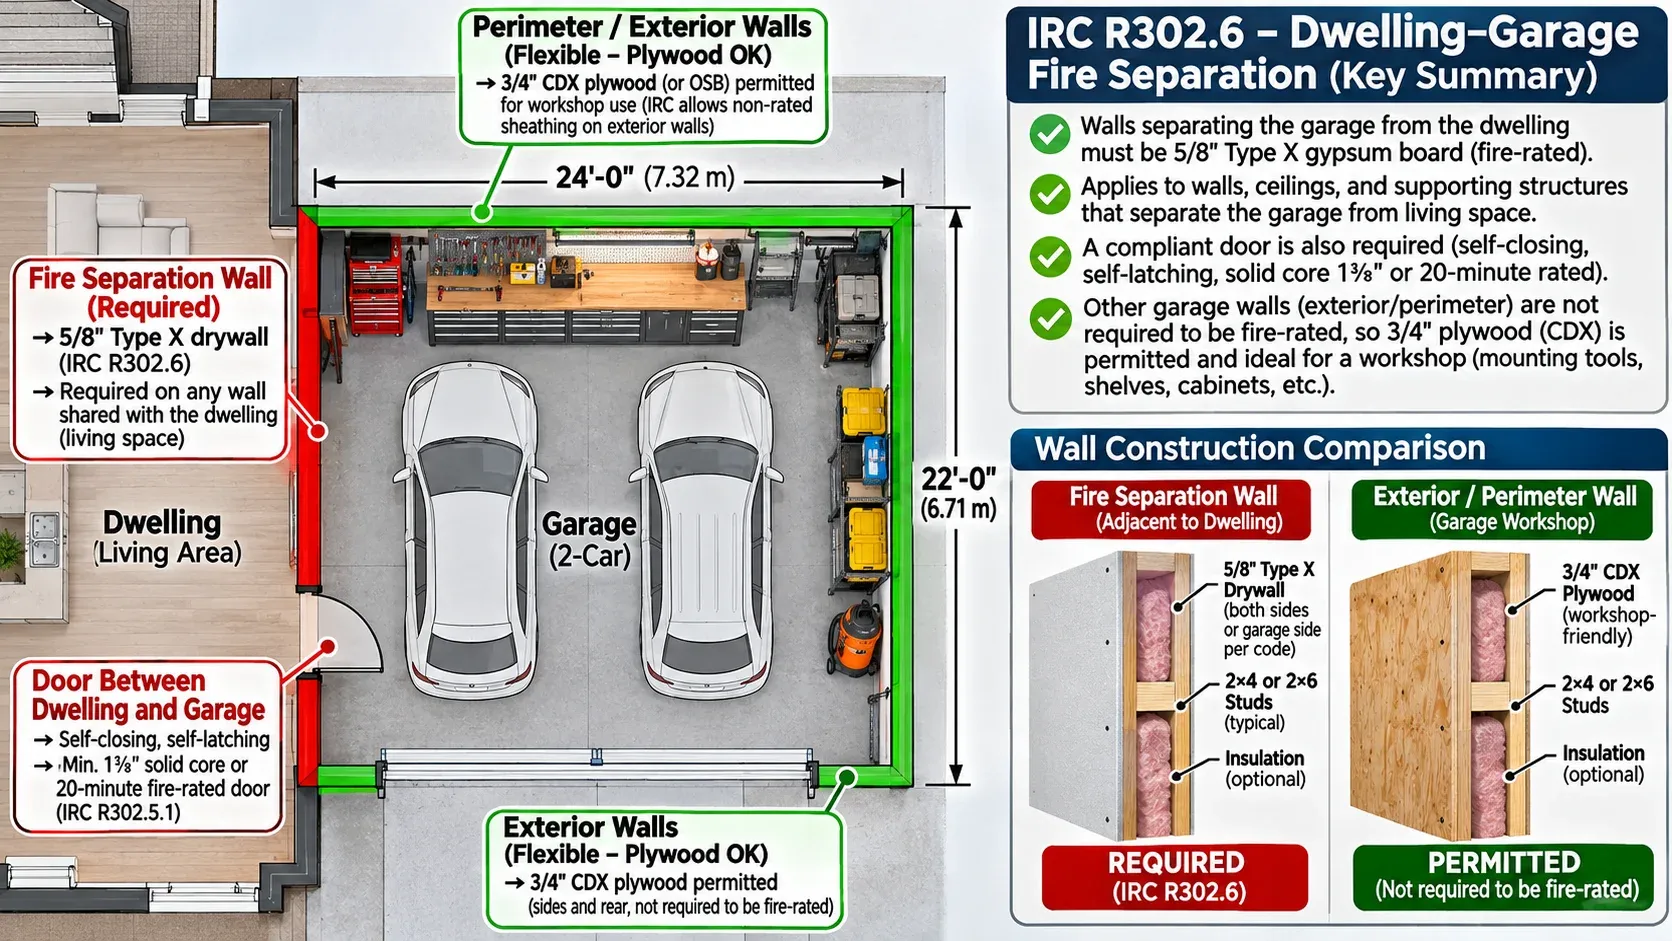
Architectural floor plan schematic illustrating building code fire separation walls (IRC R302.
Garage Wall Material Zoning: Legal Classification by Boundary
Identify code requirements across exterior, shared, and ceiling garage surfaces.
Interior wall physically shared with the heated living space or kitchen of the home
Exterior framing walls facing the driveway, side yard, or detached outbuilding
Garage ceiling located beneath a second-story master bedroom or bonus room
The “Sandwich Solution”: The Best of Both Worlds
Once you hang your heavy plywood wall panels, you have the ultimate structural anchor point. You can securely bolt cantilevered racks directly to studs using my guide on mounting lumber storage racks on wall studs without worrying about drywall anchor blowouts.
You do not have to choose between fragile drywall and code-violating bare plywood. The professional solution utilized by custom workshop builders is the Drywall Sandwich Method.
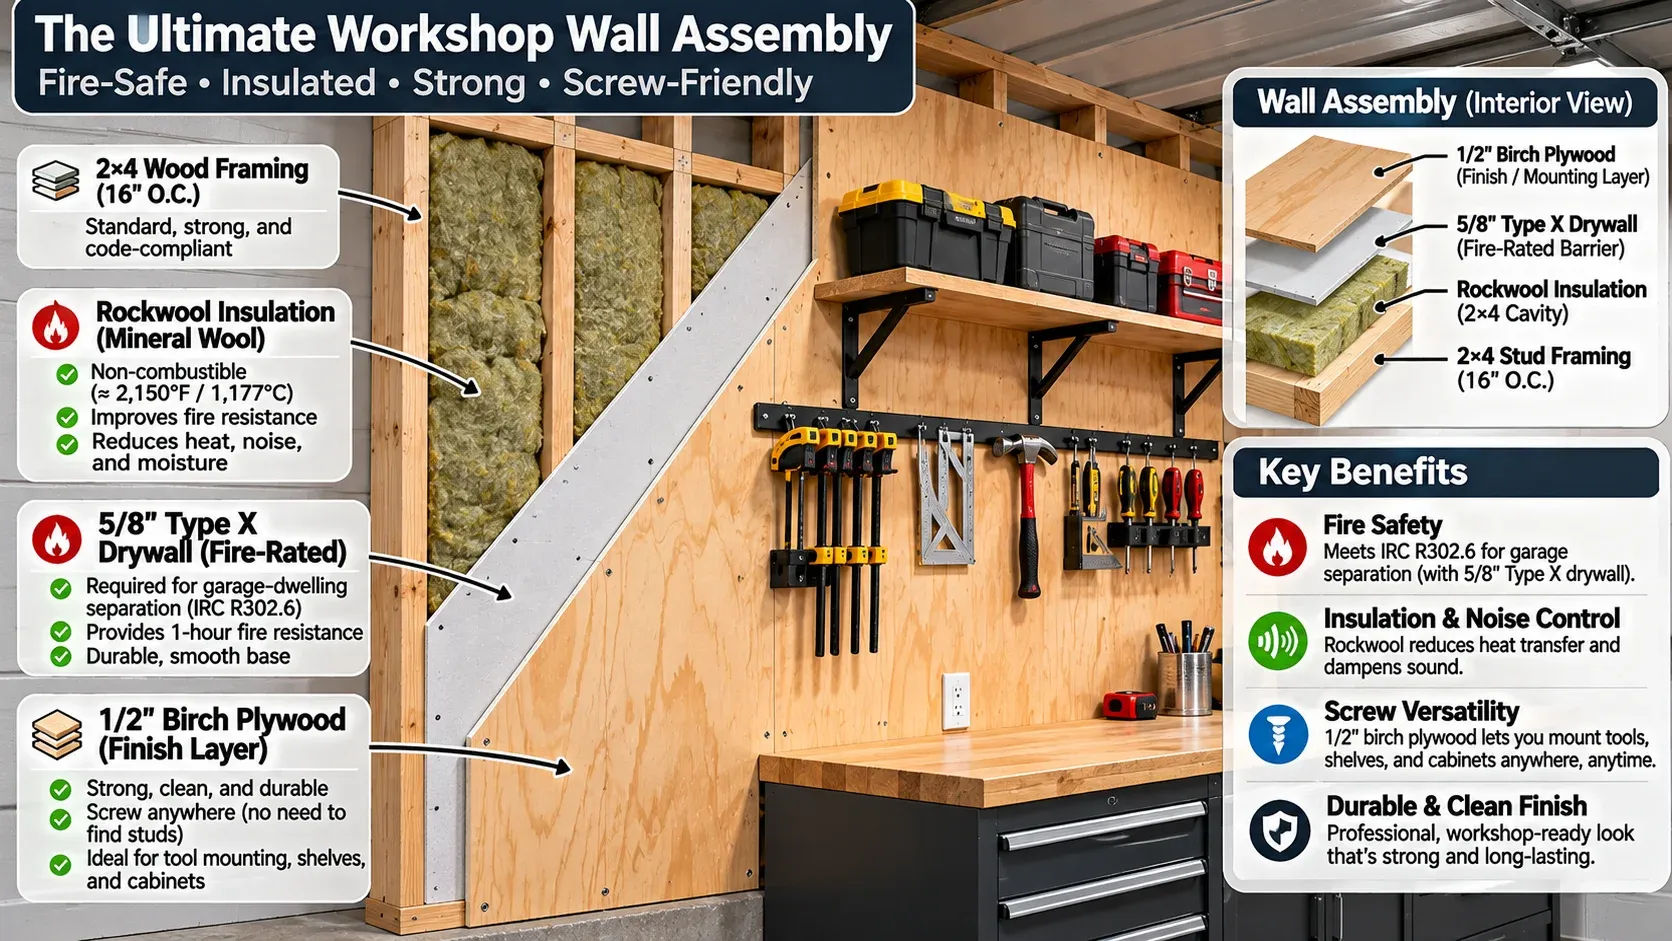
Detailed architectural cross section of the ultimate workshop wall assembly, showing 2x4 framing studs with Rockwool insulation, 5/8-inch fire-rated drywall base layer, and 1/2-inch birch plywood finish face layer, labeled callout arrows indicating fire safety and screw versatility.
Leave your existing 1/2-inch gypsum drywall completely intact along the shared residential wall, ensuring the legal fire barrier remains fully certified. Then, mount your sheets of 1/2-inch or 3/4-inch plywood directly over the face of the drywall.
Fasten the plywood through the drywall into the structural wall studs using heavy-duty structural wood screws (such as GRK Fasteners Cabinet screws) measuring 3-1/8 to 3-1/2 inches in length. The screw passes through the 3/4-inch plywood face, pierces the 1/2-inch sheetrock core, and anchors deep into the wood stud framing.
This sandwich assembly gives you the ultimate workshop wall: the underlying drywall preserves your home’s certified fire-separation envelope, while the outer plywood skin delivers an indestructible, anchor-free mounting plane for all your heavy tool storage.
Plywood vs. OSB: Which Sheet Good Should You Buy?
When selecting wooden sheet goods for workshop wall sheathing, builders debate between sanded pine plywood and Oriented Strand Board (OSB).
Oriented Strand Board costs roughly thirty percent less than pine plywood. However, OSB presents distinct workshop drawbacks: its rough flake texture snags clothing, the manufactured edges swell and delaminate when exposed to bottom humidity along concrete slab foundations, and its dark mottled color makes workshops feel like unfinished packing crates.
Four-by-eight sheets of 1/2-inch or 3/4-inch ACX or sanded pine plywood provide a flat, smooth, furniture-grade surface that holds screws tighter and resists edge delamination. The smooth surface wipes clean easily and accepts paint smoothly, creating a bright, polished workshop aesthetic.
The Bright Workshop Finish: Priming and Painting
Leaving bare plywood or OSB walls unpainted is a widespread design mistake in home workshops. Raw wood fibers absorb up to 40 percent of ambient light, leaving your workspace dim and cavernous even under modern LED fixtures.
Painting your plywood walls bright white transforms the optical volume of your garage, reflecting lighting back onto your work surfaces. However, you cannot apply standard latex wall paint directly over raw pine or OSB without proper preparation.
Raw pine knots and resinous OSB binders bleed natural tannins through water-based latex paint, leaving ugly yellow-brown stains within three months. Roll one heavy coat of oil-based stain-blocking primer, such as Kilz Original, across the wood to seal the grain. Follow with two coats of durable semi-gloss pure white interior acrylic paint that resists scuffs and wipes clean with standard degreaser.
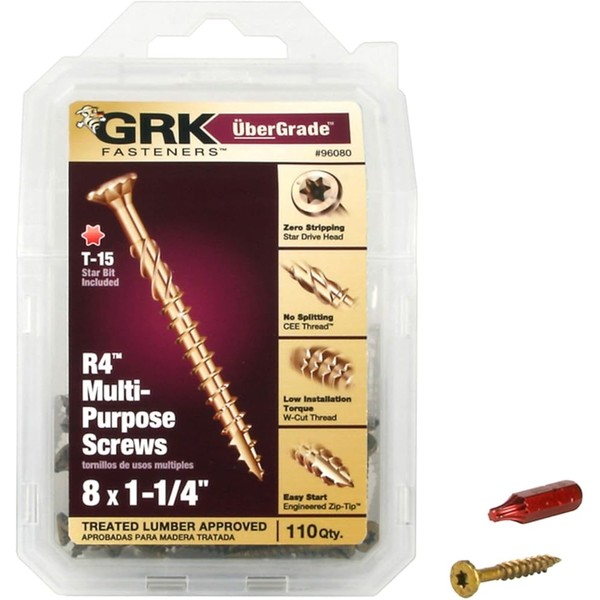
GRK Fasteners 3-1/8-Inch Heavy-Duty Cabinet Screws (100-Pack)
Best For: Anchoring plywood through drywall into structural wall studs
Est. Price: $22 - $28
"The definitive structural fastener for pulling heavy plywood securely through drywall into framing without splitting wood."
- +Recessed Star Drive (Torx) head eliminates bit stripping and cam-out
- +Washer-style head pulls plywood tight against drywall without sinking through
- +Self-tapping W-cut thread design drives cleanly without pre-drilling studs
- -Requires matching T-25 Torx driver bit included in the box
- -Costs more than standard drywall or general gold construction screws
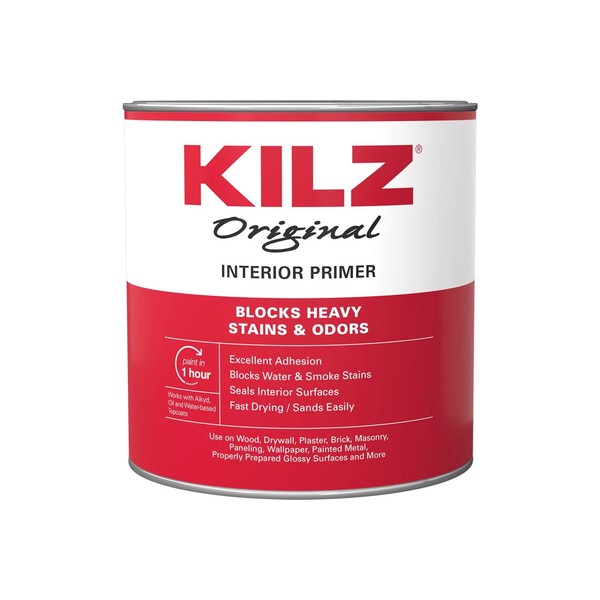
Kilz Original Interior Oil-Based Primer & Sealer (1 Gallon)
Best For: Sealing raw plywood grain and preventing knot tannin bleed-through
Est. Price: $32 - $38
"The industry standard stain-blocking primer that guarantees your white painted plywood walls stay crisp and bright without yellowing."
- +Blocks wood knot resin and OSB adhesives from staining white topcoats
- +Dries quickly to an ultra-hard sandable foundation in thirty minutes
- +Provides uniform adhesion surface for high-reflectivity semi-gloss paint
- -Strong solvent odor requires garage doors open for adequate ventilation
- -Requires mineral spirits or paint thinner for roller and brush cleanup

Franklin Sensors ProSensor M150 Multi-Sense Stud Finder
Best For: Locating stud centers behind drywall before hanging plywood
Est. Price: $42 - $52
"The fastest, most accurate multi-LED stud sensor on the market, eliminating missed screws when framing out workshop walls."
- +Nine precision LED sensors indicate exact stud edges and center simultaneously
- +Requires zero calibration sliding; place directly on wall for instant reading
- +Deep-sensing architecture reads cleanly through standard 1/2-inch drywall
- -Wide sensor bar requires two AA batteries to power the multi-LED array
- -Cannot read through metal lath and traditional plaster wall construction
Outfitting Your New Solid Workshop Walls
With structural plywood anchored securely over your studs, you can outfit your wall surfaces with heavy storage components that would tear out of hollow drywall.
Mount versatile, heavy-duty modular steel hanging systems across your new plywood face by following our breakdown in the wall storage showdown: pegboard vs. slatwall vs. French cleat.
Pair your clean, white-painted reflective plywood walls with an optimized ceiling lighting grid using our comprehensive layout guide in the two-car garage lighting blueprint.
Hank Miller
Hank is a master craftsman and DIY mechanic based in Ohio. He tests workshop equipment, garage floor coatings, and power tools under brutal, real-world workshop conditions, with zero paid brand sponsorships.